It features real-time feedback allowing instant execution, debugging and access to documentation. The instant feedback provides an unusual execution environment intended to help developing abstractions.
According to wikipedia, The developers claim that the software can reduce programming time by up to 20%.
Following are the some of the significant features of LightTable..
Features :
Free and open source
Cross-platform
In-line evaluation
Split views and instant feedback
Fuzzy finder
Auto updates
Modern UI
Auto-complete
Customizable
Here is how to install LightTable on Linux systems...
Installation :
There are two ways we can install LightTable on Linux
Method 1 :
Step 1 :
Just open terminal and copy paste the following code...
The above code will download installation script from Github and run it after file download completed.
Hi friends, I've only tested this script on Ubuntu 14.04 LTS and Ubuntu 16.04 LTS. But I hope this will work fine on other Linux distributions too.. If you can, please test it out on other Linux distributions. If you found any problem while installing LightTable with this methods.. please feel free to report it.. You can either open an issue on github or you can also report it on our Facebook Page via message(www.fb.com/opensourceinside) .
Removing/Uninstalling Lighttable From Your Linux System :
If you want to remove LightTable from your Linux system..
Snaps(apps) Everywhere New Ruler For Linux Application World
Ubuntu 'Snap' packages now available for Linux Distros based on Arch Linux, Debian, Fedora and Gentoo
Canonical Ltd. announced this month() that the lightweight Snappy Ubuntu Core's "snap" mechanism, which can now also work with other Linux distributions. Yes, You heard correctly...!! Snappy apps can now run on several different Linux distributions, including Arch, Debian, Fedora, and Gentoo.
This wide-ranging support could see Snap apps become the de-facto Linux app package format. Imagine it: a single binary package that will work perfectly, predictably and securely on any Linux desktop, server, cloud or device regardless of which flavor of Linux it runs.
"Linux fragmentation (Especially, Fragmentation In Linux Application Ecosystem)" is one of the issues being faced by Linux community for longtime, But Cross distro support for Snap apps may end this...
"Snaps bring apps to every Linux desktop, server, device or cloud machine, giving users freedom to choose any Linux distribution while retaining access to the best apps."
The idea behind Snaps is that it will help software vendors distribute their Linux-based apps more easily.
"We strive to offer users a great experience and make Firefox available across many platforms, devices and operating systems. With the introduction of snaps, continually optimizing Firefox will become possible, providing Linux users the most up-to-date features," said Nick Nguyen, Vice President of Product, Firefox at Mozilla, in a statement.
Boudewijn Rempt, project lead at the Krita Foundation who said: "Maintaining .deb packages in a private repository was complex and time consuming, snaps are much easier to maintain, package and distribute. Putting the snap in the store was particularly simple, this is the most streamlined app store I have published software in."
Some Salient Features Of Snappy Apps :
Enhanced security for apps and devices
Each snap is confined using a range of kernel isolation and security mechanisms, tailored to the snap, ensuring that vulnerabilities in the application are contained to the greatest degree currently possible. A careful review process ensures that snaps only receive the permissions they require to operate. Users do not have to make complex security decisions when installing the snap.
"Security is particularly important when running third-party software," said Steve Langasek, a Debian developer. "Snaps meet that challenge with robust confinement, neatly addressing many of the risks of apps in sensitive environments."
Simpler and easier to create
The snap format is simpler than the native internal package formats of individual Linux distributions, because it is focused purely on applications rather than the core system itself. Snaps are essentially self-contained zip files that can be executed very fast in place, making them easy to create.
"Snaps are much easier to create than traditional Linux packages, and allow us to evolve dependencies independent of the base operating system."
Automatic updates
Updated snaps are delivered automatically, improving the flow of features and fixes as well as the feedback cycle both for commercial applications and for open source applications.
Stable, candidate, beta and daily versions
Stable releases, release candidates, beta versions and daily builds of a snap can all be published at the same time, enabling users to preview upcoming releases with different levels of stability.
"Rolling updates are popular in the Arch community," said Tim Jester-Pfadt, an Arch contributor. "One nice feature of snaps is support for edge and beta channels, which allow users to opt-in to the pre-release developer versions of software or stick with the latest stable versions".
On top of this, they can be both updated or rolled back to previous versions. One area where this aspect is being used is in IoT.
Free software on Github
The snap format, designed by Canonical, is handled by snapd, a free software project on Github. Porting snapd to a wide range of Linux distributions has proven straightforward, and the community has grown to include contributors from a wide range of Linux backgrounds.
Snap packages are easily created with the snapcraft tool. The home of the project is snapcraft.io which includes a tour and step-by-step guides to snap creation, along with documentation for users and contributors to the project. Snaps can be built from existing distribution packages, but are more commonly built from source for optimization and size efficiency.
What About App Image, Flatpak, Orbital Apps, Etc?
App Image has been around for a while. 'It delivers a single binary but it doesn't make any attempt to do it in a secure way; it doesn't have the upgrade semantics that Snaps were designed to introduce,' Shuttleworth explains.
Flatpak is the new name for GNOME's XDG-App initiative, though '95% of the commits come from one Red Hat employee,' Shuttleworth cheekily noted. 'We would be delighted if they'd work with us."
Orbital Appsare primarily focused on portability and do not offer a transactional update model.
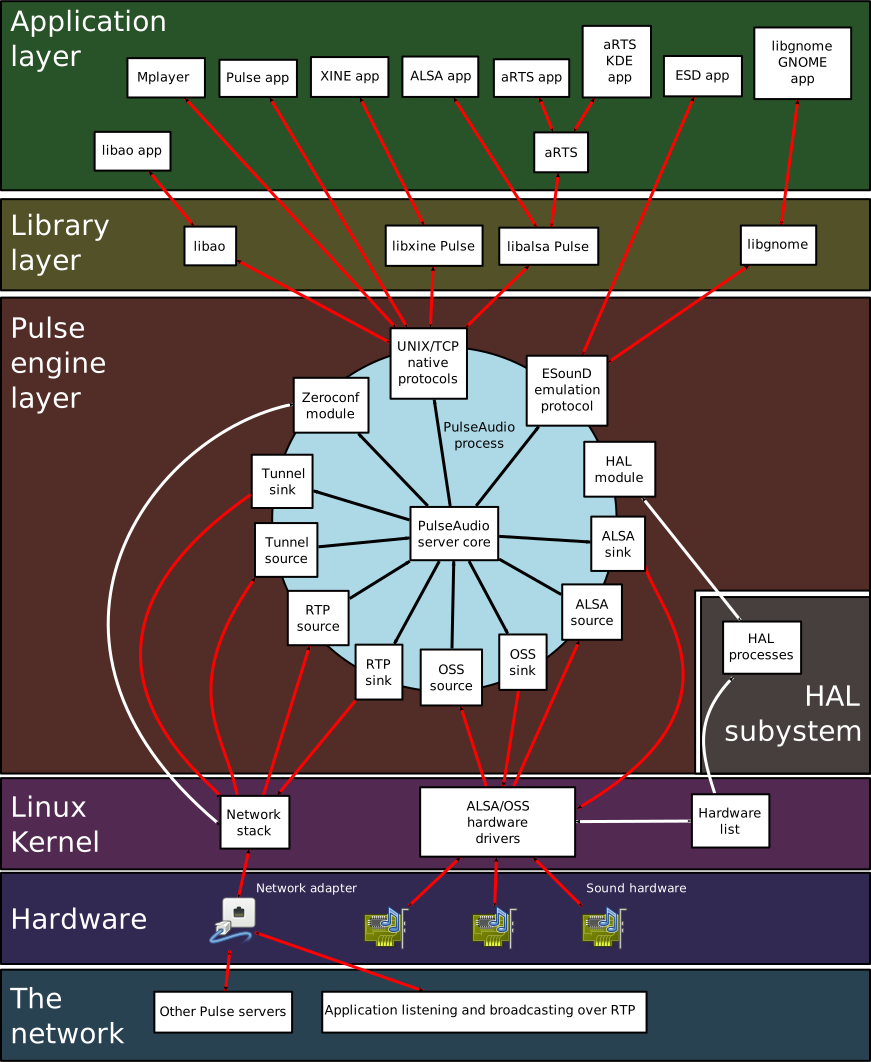
A zero-copy memory architecture for processor resource efficiency.
Ability to discover other computers using PulseAudio on the local network and play sound through their speakers directly.
Ability to change which output device an application plays sound through while the application is playing sound (without the application needing to support this, and indeed without even being aware that this happened).
A command-line interface with scripting capabilities.
A sound daemon with command line reconfiguration capabilities.
Built-in sample conversion and resampling capabilities.
The ability to combine multiple sound cards into one.
The ability to synchronize multiple playback streams.
JACK (JACK Audio Connection Kit) Sound Server For Linux
JACK Audio Connection Kit (or JACK) is a professional sound serverdaemon that provides real-time, low-latency connections for both audio and MIDI data between applications that implement its API. JACK has been developed by a community of open-source developers led by Paul Davis (who won an Open Source Award in 2004 for this work) and has been a key piece of infrastructure and the de facto standard for professional audio software on Linux since its inception in 2002. The server is free software, licensed under the GNU GPL, while the library is licensed under the more permissive GNU LGPL.
How to install Ardour (digital audio workstation) on Linux
Ardour stands out as the most popular go-to digital audio workstation on GNU/Linux. It offers professional-quality recording, mixing, and all-around production. The MIDI capabilities are functional, but less robust. For multitrack recording, this is the way to go. Ardour is fully JACK capable, but the newest versions can simply use ALSA directly if you just use Ardour alone as an all-in-one tool. Though its detailed feature list is shorter, Ardour has all the core capabilities to match that of the expensive proprietary competition. For recording a band in a studio or overlaying dubs of live performances, this is all you really need.
Installation :
For Ubuntu :
There is a community maintained PPA is available for Ubuntu..
DO NOT use this PPA if you are using the KXStudio PPAs. The KXStudio PPAs intentionally break the Ubuntu upgrade path, and will result in crashes or worse, if combined with this PPA.
If you want binaries you have to pay.. however you can get source code for free of cost and then, you can compile it on your system.. Here , I am going to show how to compile it from source code..
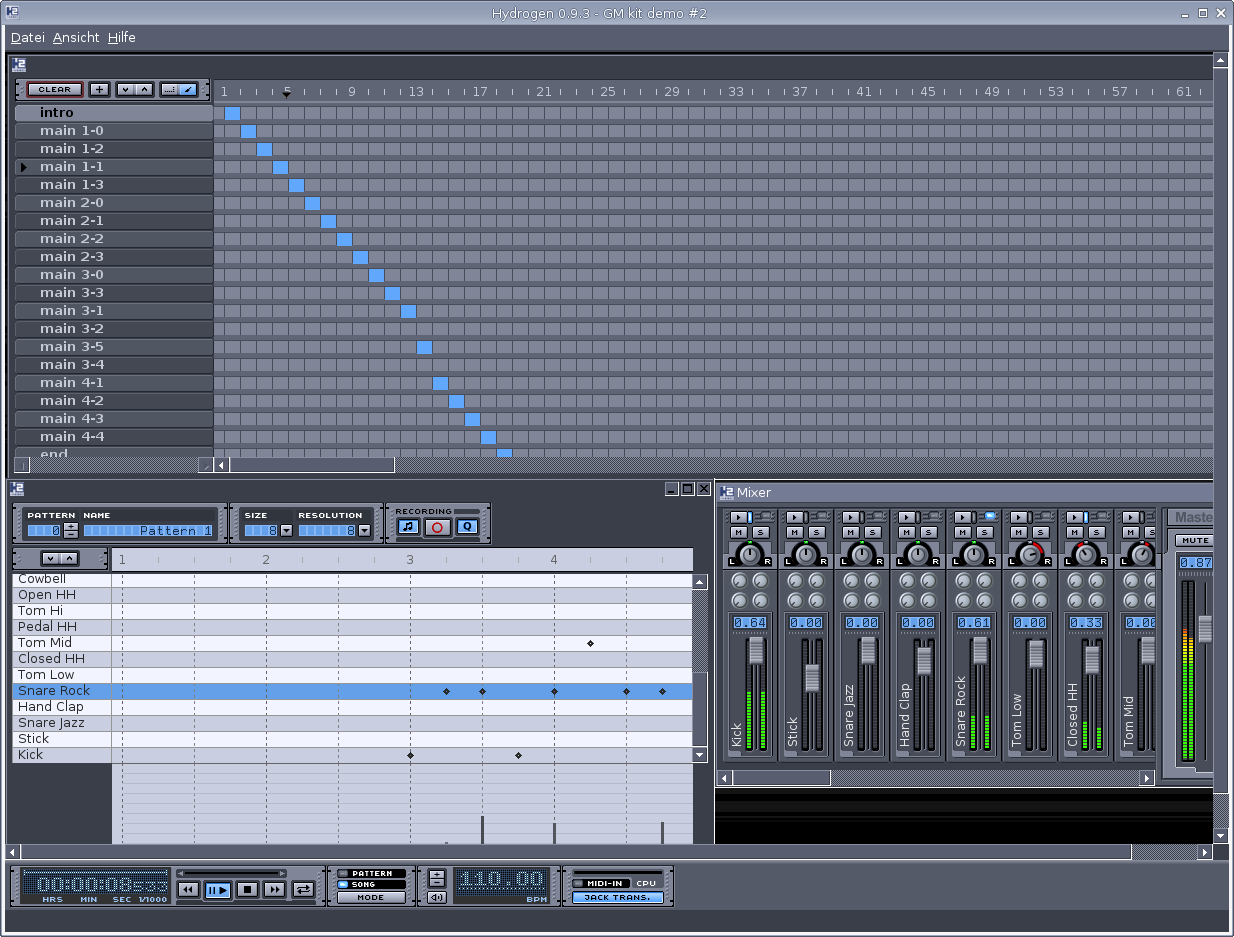
Hydrogen is an open source drum machine created by Alessandro Cominu, an Italian programmer who goes by the pseudonym Comix. Its main goal is to provide professional yet simple and intuitive pattern-based drum programming.
Hydrogen was originally developed for Linux, but later ported to Mac OS X. The graphical user interface for the application uses Qt library, and all code is released under the GNU General Public License.
Features :
These are the features of Hydrogen:
Pattern-based sequencer, with unlimited number of patterns and ability to chain patterns into a song.
Up to 192 ticks per pattern with individual level per event and variable pattern length.
Unlimited instrument tracks with volume, mute, solo, pan capabilities.
Multi-layer support for instruments (up to 16 samples for each instrument).
Option to slightly randomize velocity, time, pitch and swing functions to give a more "human" playback.
Multiple patterns playing at once.
GMkit, the drum kit features: Kick, Stick, Snare Jazz, Hand Clap, Snare Rock, Tom Low, Closed HH (high hat), Tom Mid, Pedal HH (high hat), Tom Hi (high), Open HH (high hat), Cowbell, Ride Jazz, Crash, Ride Rock, and Crash Jazz.
Installation :
Since there is many Linux Distros, Hydrogen developers not providing distro specific binaries for installation.. so we have to compile from source..
These are the instructions for compiling the Hydrogen versions 0.9.6 (all based on QT4) on a debian-based distribution. Hydrogen runs on all kinds of linux distribution, but then the package names and installation tools will differ.
Audacity is a free open source digital audio editor and recording computer software application, available for Windows, OS X, Linux and other operating systems.
For basic audio recording, Audacity works. It doesn't provide any advanced mixing or composition tools, but it has wonderful effects and detailed tools for audio editing. Audacity is probably the best program to explore the nature of sound in fundamental ways, playing with generating tones and combining waveforms.
Install Audacity On Ubuntu..
You can use Audacity PPA to install Audacity on ubuntu systems..
Audacity 2.1.2 is not available via any repository, we have to download the audacity rpm package and to install it via rpm. Follow the instructions for your system and architecture exactly, in order to get a successful installation.
For 32 bit systems:
cd && wget https://kojipkgs.fedoraproject.org//packages/audacity/2.1.2/4.fc24/i686/audacity-2.1.2-4.fc24.i686.rpm && sudo rpm -Uhv audacity-2.1.2-4.fc24.i686.rpm
For 64 bit systems
cd && wget https://kojipkgs.fedoraproject.org//packages/audacity/2.1.2/4.fc24/x86_64/audacity-2.1.2-4.fc24.x86_64.rpm && sudo rpm -Uhv audacity-2.1.2-4.fc24.x86_64.rpm
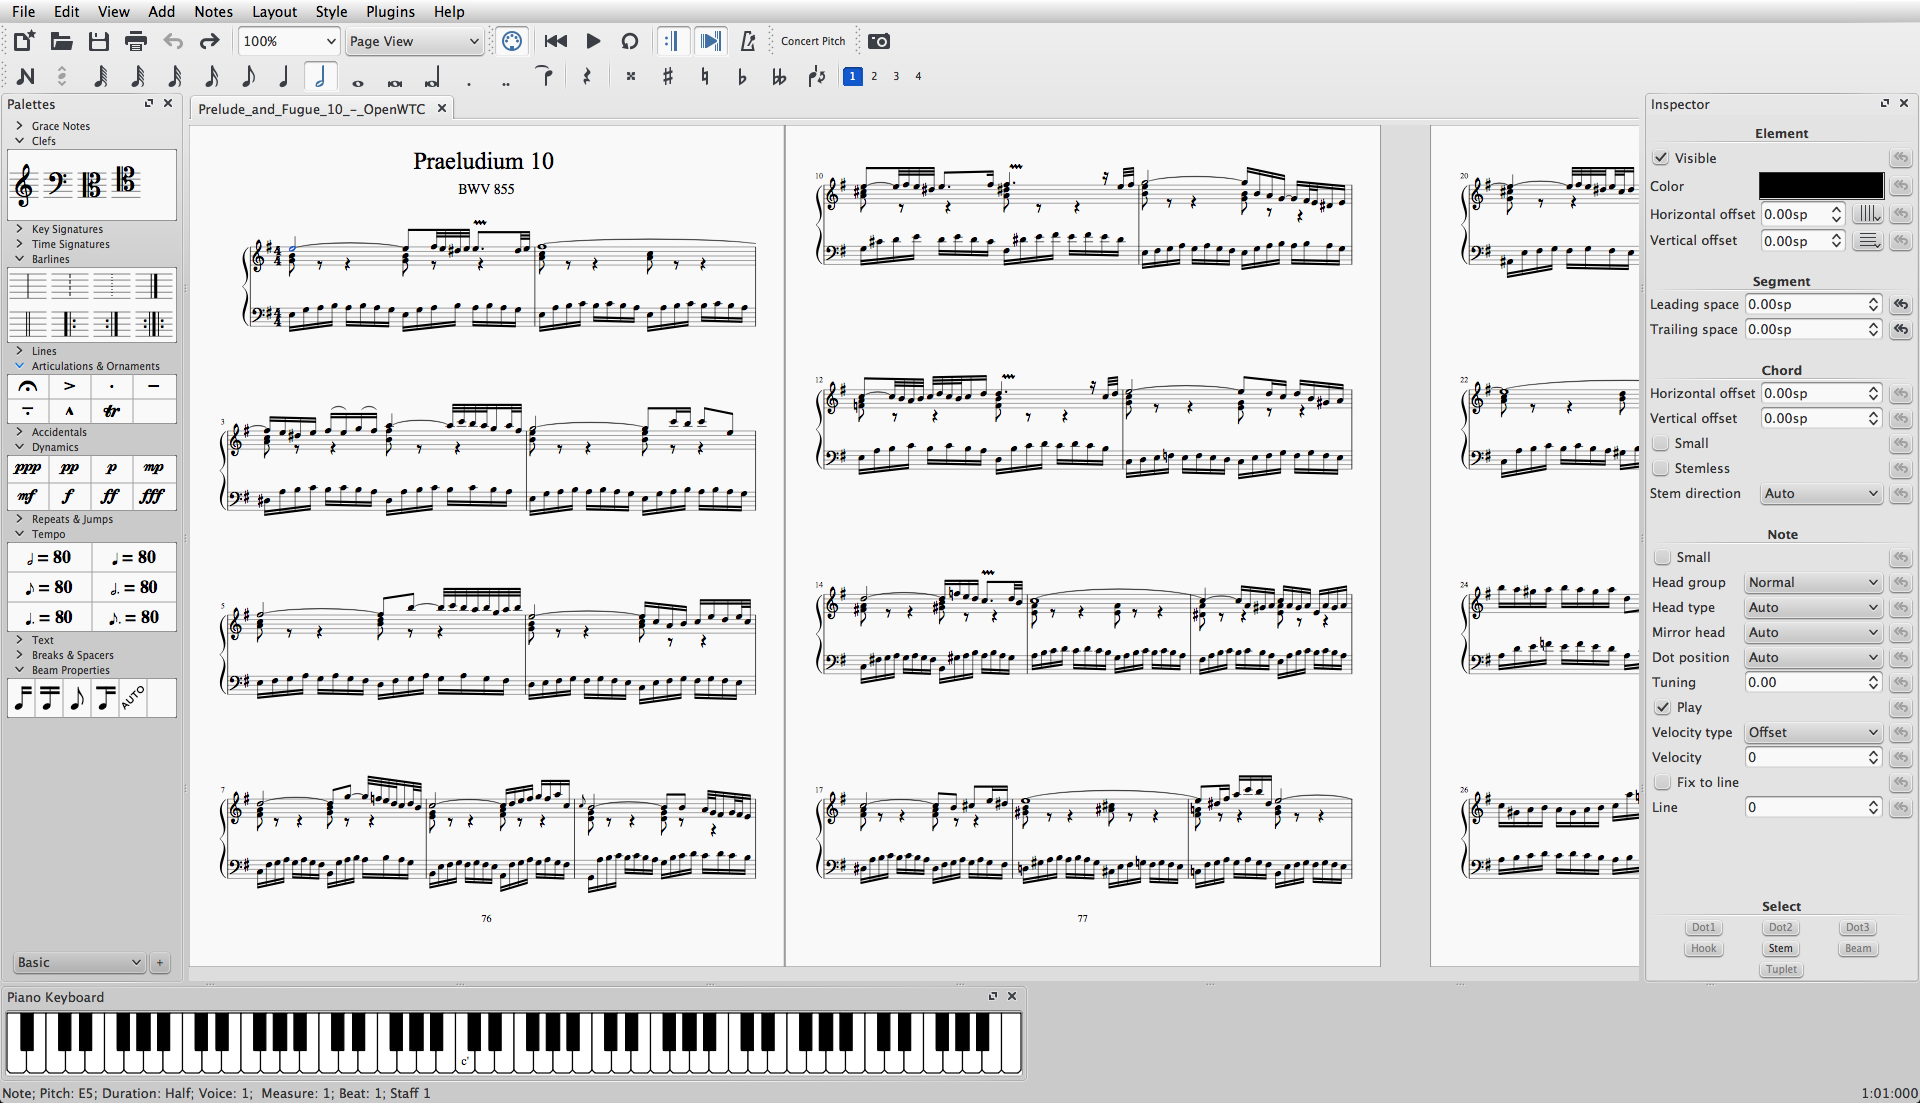
MuseScore is a scorewriter for Windows, OS X, and Linux, comparable to Finale and Sibelius, supporting a wide variety of file formats and input methods. It is released as free and open-source software under the GNU General Public License.
MuseScore was originally created as a fork of the MusE sequencer's codebase. At that time, MusE included notation capabilities and in 2002, Werner Schweer, one of the MusE developers, decided to remove notation support from MusE and fork the code into a stand-alone notation program. Since then, MuseScore has been under constant active development.
Installation through PPA (For Ubuntu based Linux systems only..) :
Run the following command to install MuseScore in Ubuntu and it's derivative linux systems..
Installation Through Appimage (Works for all Linux Systems..)
Appimage is a new application format for Linux applications.. It doesn't require installation. these apps are fully portable and we can run this apps probably on any Linux system.. Here I will show you how to download and run this apps on your Linux system.
Step 1 - Download :
Before you download an AppImage, you need to know your processor's architecture. These terminal commands will show it:
arch
or
uname -m
The output will be something like "i686", "x86_64" or "armv7":
i686 (or similar) - 32 bit Intel/AMD processor. (Found on older machines.)
x86_64 (or similar) - 64 bit Intel/AMD processor. (Modern laptop and desktop computers, most Chromebooks.)
armv7 (or later) - ARM processor. (Phones & tablets, Raspberry Pi 2/3 running Ubuntu Mate, some Chromebooks. Usually 32 bit at present.)
Now you can head over to the Download page and find the AppImage that best matches your architecture. Once downloaded, the file will be named "MuseScore-X.Y.Z-$(arch).AppImage".
Step 2 - Give execute permission :
Before you can use the AppImage you need to give permission for it to be run as a program.
From Terminal :
This command gives the user (u) permission to execute (x) the AppImage. It works on all Linux systems.
cd ~/Downloads && chmod u+x MuseScore*.AppImage
Note: Use the "cd" command to change directory to wherever you saved the AppImage. For example the above command assumes that our downloaded Appimage is present inside the user's Desktop folder..
From a File Manager:
If you prefer to avoid the command line, there is usually a way give execute permission from inside a File Manager. In GNOME Files (Nautilus), simply:
Right-click on the AppImage and select "Properties".
Open the "Permissions" tab.
Enable the option labelled "Allow executing file as a program".
Step 3 - Run it! :
Now you should be able to run the program simply by double-clicking on it!
When you downloaded the AppImage it was probably saved in your Downloads folder, but you can move somewhere else it at any time (e.g. you could put it on your desktop for easy access). If you ever want to remove it then simply delete it.
Corebird Native Gtk+ Twitter client for the Linux desktop
Corebird is a modern, easy-to-use and opensource Native Gtk+ Twitter client for Linux which provides support for almost all twitter features, including lists, favourites, direct messages and of course tweeting.
Install Corebird on Ubuntu :
The easiest way of installing corebird on Ubuntu is adding a PPA from ubuntuhandbook1.
Even though Ubuntu default installation provides torrent application.. Installing qbittorrent is worthy.. because it's a simple, effecient and clean to use..
Installation :
sudo apt-get install qbittorrent
22 . Install Synaptic Package Manager
Synaptic is one of the most amazing package managers out there, in fact, it was installed by default in Ubuntu but later it was removed in the recent Ubuntu releases, but it still a good program to have for those who want to manage their system packages easily without the need to deal with the command line.
Installation :
sudo apt-get install synaptic
23 . Install Openshot Video Editor
OpenShot Video Editor is a simple, powerful , free and open-source video editing software available for Linux , windows and OS X. and it supports many media formats.
Installation :
sudo apt-get install openshot
24 . Install Simple Screen Recorder (SSR)
If you want to record desktop screen casts on linux... then simple screen recorder is a simple and best option for your need.
Shutter is a feature-rich screenshot program for Linux based operating systems such as Ubuntu. You can take a screenshot of a specific area, window, your whole screen, or even of a website - apply different effects to it, draw on it to highlight points, and then upload to an image hosting site, all within one window. Shutter is free, open-source, and licensed under GPL v3.
Installation :
sudo apt-get install shutter
26 . Install dconf Editor
You can customize your system further with dconf-editor. it's a low level configuration tool which offers a simple GUI interface to GSettings. It lets you get, set or monitor an individual key for changes.
Installation
sudo apt-get install dconf-editor
27 . Remove Ubuntu Customizations In Firefox
We know that , version of Firefox shipping with Ubuntu is not a vanilla flavor of Firefox web browser.
It is a Customized version of Firefox offered by Ubuntu..some of us may don't like this modifications in Firefox.. However we can disable that modifications temporarily or even Remove them permanently.
See the instructions here...
How to remove Ubuntu Modifications for Firefox In Ubuntu
28 . Remove Amazon app and search in Ubuntu
No doubt ,Ubuntu has many cool features.. and also some annoying additions too...
Amazon app/shopping-lens is one of that annoying addition (for many Ubuntu users)..
However ,we can remove it simply with following command.
Steam is a digital store for Windows, Mac and Linux games. It has many great games, some of them are free and some aren’t. If you’re a gaming fan, you’ll love trying Steam.
To install it, run the following command in your terminal.
Installation
sudo apt-get install steam
If it's not works for you.. then try this method..
gdebi is a simple tool to install .deb files.
It lets you install local deb packages resolving and installing
its dependencies.
It has a graphical user interface but can also be used in your terminal.
GDebi can install local .deb packages with automatic dependency resolution (it automatically downloads and installs the required packages with apt).
You can install deb packages without using software center
Installation
sudo apt-get install gdebi
Don't Forget To Share It With Your Friends..!! Share Your ♥ With Linux and Opensource
Simple Screen Recorder (SSR) A Feature Rich Screen Recorder Application For Linux
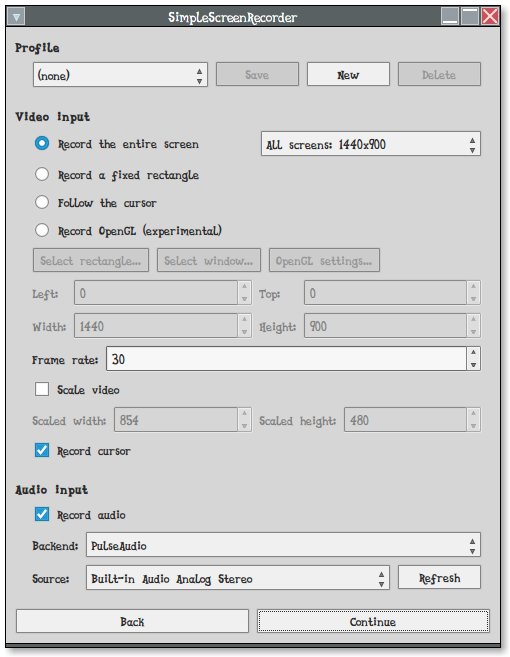
SimpleScreenRecorder is a Qt-based sophisticated opensource screencast software made for Linux operating systems , which was created as a simpler alternative to programs such as ffmpeg/avconv and VLC.
The official website states that... following as ssr's main goal..
SimpleScreenRecorder is a Linux program that I've created to record programs and games. There were already a few programs that could do this, but I wasn't 100% happy with any of them, so I created my own.
My original goal was to create a program that was just really simple to use, but as I was writing it I started adding more and more features, and the result is actually a pretty powerful program. It's 'simple' in the sense that it's easier to use than ffmpeg/avconv or VLC, because it has a straightforward user interface.
Features :
Graphical user interface (Qt-based).
Faster than VLC and ffmpeg/avconv.
Records the entire screen or part of it, or records OpenGL applications directly (similar to Fraps on Windows).
Synchronizes audio and video properly (a common issue with VLC and ffmpeg/avconv).
Reduces the video frame rate if your computer is too slow (rather than using up all your RAM like VLC does).
Fully multithreaded: small delays in any of the components will never block the other components, resulting is smoother video and better performance on computers with multiple processors.
Pause and resume recording at any time (either by clicking a button or by pressing a hotkey).
Shows statistics during recording (file size, bit rate, total recording time, actual frame rate, ...).
Can show a preview during recording, so you don't waste time recording something only to figure out afterwards that some setting was wrong.
Uses libav/ffmpeg libraries for encoding, so it supports many different codecs and file formats (adding more is trivial).
Sensible default settings: no need to change anything if you don't want to.
Tooltips for almost everything: no need to read the documentation to find out what something does.
Installation
Install SSR on Ubuntu And Its Derivatives
There is a PPA available for Ubuntu/Linux Mint and its derivatives.. So we can simply add that to our system and can install it easily..
Run the following command to install SSR in Ubuntu..
You have to enable RPM Fusion repos(EPEL repos too.. for RHEL and CentOS) inorder to install SSR dependencies
Step 1 :
Before installing SSR you have to enable/install RPM Fusion repos , for RHEL/CentOS, EPEL repos.. You Can Find Instructions here.. How To Enable RPM Fusion repos and How To Enable EPEL repos