How To Install & Use ArangoDB 3
On
Ubuntu 14.04 and 16.04 LTS

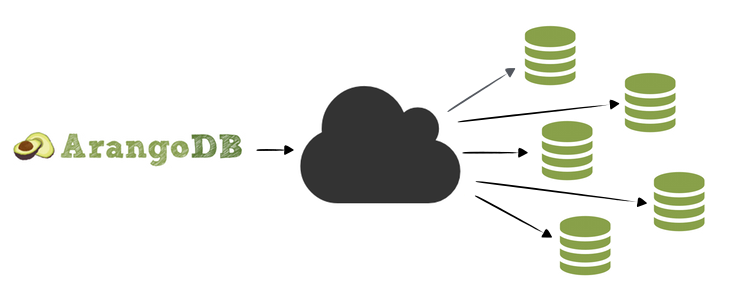
ArangoDB is a NoSQL, multi-model, open-source database with flexible data models for documents, graphs, and key-values. Build high performance applications using a convenient SQL-like query language or JavaScript extensions. Its creators refer to it as a "native multi-model" database to indicate that it was designed specifically to allow key/value, document, and graph data to be stored together and queried with a common language (known as AQL).
ArangoDB On GitHub.
Significant Features Of ArangoDB
- Multi-Model : Documents, graphs and key-value pairs - model your data as you see fit for your application.
- Joins : Conveniently join what belongs together for flexible ad-hoc querying, less data redundancy.
- Transactions : Easy application development keeping your data consistent and safe. No hassle in your client.
- It is open source (Apache License 2.0)
- ArangoDB is multi-threaded - exploit the power of all your cores
Install ArangoDB :
Method 1:
In this method you have to execute commands shown below one by one(manually) to install ArangoDB.. but method 2 is more easy way to do this... because the second method uses shell script that will do all these installation steps automatically, for you.. ☻ .
Step 1 : First add the repository key to apt :
For Ubuntu 16.04 LTS :
wget https://www.arangodb.com/repositories/arangodb3/xUbuntu_16.04/Release.key && sudo apt-key add - < Release.key
For Ubuntu 14.04 LTS :
wget https://www.arangodb.com/repositories/arangodb3/xUbuntu_14.04/Release.key && sudo apt-key add - < Release.key
The sample output should be like this..
Step 2 : Create a list file for ArangoDB & Update The Source List
Next, you need to add the ArangoDB repository details so apt will know where to download the packages from... After adding the repository details, you will need to update the packages list.
For Ubuntu 16.04 LTS :
echo 'deb https://www.arangodb.com/repositories/arangodb3/xUbuntu_16.04/ /' | sudo tee /etc/apt/sources.list.d/arangodb.list && sudo apt-get update
For Ubuntu 14.04 LTS :
echo 'deb https://www.arangodb.com/repositories/arangodb3/xUbuntu_14.04/ /' | sudo tee /etc/apt/sources.list.d/arangodb.list && sudo apt-get update
Step 3 : Install the ArangoDB packages
You can install the latest stable release of ArangoDB version 3 with following command...
sudo apt-get install arangodb3
The above command will install ArangoDB from official ArangoDB repos... contains following packages..
The ArangoDB package comes with the following programs:
arangod: The ArangoDB database daemon. This server program is intended to run as a daemon process and to serve the various clients connection to the server via TCP / HTTP.
arangosh: The ArangoDB shell. A client that implements a read-eval-print loop (REPL) and provides functions to access and administrate the ArangoDB server.
arangoimp: A bulk importer for the ArangoDB server. It supports JSON and CSV.
arangodump: A tool to create backups of an ArangoDB database in JSON format.
arangorestore: A tool to load data of a backup back into an ArangoDB database.
arango-dfdb: A datafile debugger for ArangoDB. It is primarily intended to be used during development of ArangoDB.
arangobench: A benchmark and test tool. It can be used for performance and server function testing.
Step 4 :See The Status Of ArangoDB
Issue the following command to check the status of arangod (arangodb server)
For Ubuntu 14.04 :
sudo service arangodb3 status
If ArangoDB Running properly, you should get output like this..
For Ubuntu 16.04 :
sudo systemctl status arangodb3
The above command will produce following output if ArangoDB works fine..
Securing the installation :
The default installation contains one database _system and a user named root . Debian based packages and the Windows installer will ask for a password during the installation process. Red-Hat based packages will set a random password. For all other installation packages you need to execute.arango-secure-installation
This will asked you for a root password and sets this password.
Method 2:
In this method, the following command will download shell script from GitHub repo and will execute it to make installation of ArangoDB easy.. The downloaded script will take care of all things..
wget -O - https://raw.githubusercontent.com/shivarajnaidu/UV-Shell-Scripts/master/ArangoDB%20Installation%20Scripts/arangodb-installation-script-for-ubuntu.sh | bash -
Basic Use Of ArangoDB (On Ubuntu)..
You can interact with ArangoDB server in two ways.. One way is ArangoDB shell (arangosh) - A command line interface to interact with ArangoDB server... Another way is ArangoDB web interface which offers GUI interface to interact with ArangoDB server..
Accessing ArangoDB from shell (arangosh) :
Run the arangosh command to invoke ArangoDB Shell:
The ArangoDB shell (arangosh) is a command-line tool that can be used for administration of ArangoDB, including running ad-hoc queries. It offers a JavaScript shell environment providing access to the ArangoDB server. Arangosh can be invoked like this:
arangosh
If you didn't set any password while installing ArangoDB then the password is empty.. You can proceed just by leaving it as empty while it asking for password.. Just hit ENTER key..
If Arangosh started successfully You will see output like the one shown below..
 arangosh (ArangoDB 3.0.3 [linux] 64bit, using VPack 0.1.30, ICU 54.1, V8 5.0.71.39, OpenSSL 1.0.1f 6 Jan 2014)
Copyright (c) ArangoDB GmbH
Pretty printing values.
Connected to ArangoDB 'http+tcp://127.0.0.1:8529' version: 3.0.3 [server], database: '_system', username: 'root'
Type 'tutorial' for a tutorial or 'help' to see common examples
127.0.0.1:8529@_system>
We can get more detailed help for command line administration of ArangoDB by running help command.
Run help command in arangodb shell, output will look like this..
The result is basically a JavaScript shell where you can run arbitrary JavaScript code. For example, add two numbers:
127.0.0.1:8529@_system> 23 + 2
You will get output like this..
User Management In ArangoDB :
ArangoDB allows to restrict access to databases to certain users. All users of the system database are considered administrators. During installation a default user root is created, which has access to all databases.
You should create a database for your application together with a user that has access rights to database.
Debian based package installer will ask for a password during the installation process. Red-Hat based packages will set a random password. For all other installation packages you need to execute.
arango-secure-installation
This would ask you for a root password and sets this password.If you leave password field as blank ... you can login without entering password..
Creating A New User :
The following would create a user named shivaraj.. (But, by default, this user will have no access at all (to any database).. we need to give privilege to newly created user, to access database.)
var users = require("@arangodb/users");

users.save("shivaraj", "mypassword");
Or
require("@arangodb/users").save("shivaraj", "mypassword");
The Output would be look like below..
The save method will take 4 parameters.. like shown below..
require("@arangodb/users").save(user, password, active, extra);
This will create a new ArangoDB user. The user_name must be specified in user and must not be empty.
The password must be given as a string, too, but can be left empty if required.
If the active attribute is not specified, it defaults to true. The extra attribute can be used to save custom data with the user.
In addition to this.. the newly created user will not have permission to access any database. You need to grant the access rights for one or more databases using grantDatabase method...
Granting & Revoking Permission To User, To Access The Database :
So after creating User we need to give privilege to new user to access the database using grantDatabase method. revokeDatabase method will revoke the right to access database.
Granting permission to access Database :
The following will grants read/write access to the database for the user.
require("@arangodb/users").grantDatabase(user, database);
For Example, The following will grant permission to user named shivaraj to access database uvdb.
require("@arangodb/users").grantDatabase("shivaraj", "uvdb");
Revoking permission to access Database :
The following will revokes read/write access to the database for the user.
require("@arangodb/users").revokeDatabase(user, database);
For Example, The following will revoke permission to user named shivaraj to access database uvdb.
require("@arangodb/users").revokeDatabase("shivaraj", "uvdb");
List All ArangoDB Users :
The following will list all users belongs to ArangoDB...
require("@arangodb/users").all();
The output would look like following one...
Removing A User :
The following will delete user from ArangoDB
require("@arangodb/users").remove(user);
Remove method will remove an existing ArangoDB user from the database.
The username must be specified in User and the specified user must exist in the database.
This method will fail if the user cannot be found in the database.
For example, Following will remove user named shivaraj from ArangoDB..
require("@arangodb/users").remove("shivaraj");
See More about User Management In Official ArangoDB Documentation..
Basic Database Management :
This section will explain you ... performing basic CURD operations on Databases through ArangoDB shell(arangosh)
Creating A New Database..
We can create a new database using createDatabase method..
Syntax :
db._createDatabase(name, options, users)
The createDatabase will accept 3 parameters ...
The first parameter(name) will specify the name of the database we are going to create
The second parameter(options) currently has no meaning and is reserved for future use.
The optional users attribute can be used to create initial users for the new database. If specified, it must be a list of user objects. Each user object can contain the following attributes:
username: the user name as a string. This attribute is mandatory.
passwd: the user password as a string. If not specified, then it defaults to an empty string.
active: a boolean flag indicating whether the user account should be active or not. The default value is true.
extra: an optional JSON object with extra user information. The data contained in extra will be stored for the user but not be interpreted further by ArangoDB.
For example.. The following will create database named 'uvdb' with user named shivaraj .
db._createDatabase("uvdb", [], [{ username: "shivaraj", passwd: "root"}]);
The sample output would look like this, if database created successfully..
Switch to Particular Database :
You can switch to particular database from the current database using db._useDatabase method.
Syntax :
db._useDatabase(db_name);
The following will switch to newly created database uvdb from currently working database..
db._useDatabase('uvdb');
The sample output will be look like following one..
List All Existing Databases In ArangoDB :
We can list all existing Databases in ArangoDB using db._databases method..
db._databases();
Sample output :
Drop/Delete A Database :
We can drop(delete) an existing database using _dropDatabase method..
db._dropDatabase(name);
For example, following will delete database named "uvdb"...
db._dropDatabase('uvdb');
Sample output :
Basic Collection Management :
This section will explain you ... performing basic CURD operations on Collections in a Database through ArangoDB shell(arangosh)
Creating A New Collection In Database:
We can create a new collection using _create method.
db._create(collection-name);
For example, The following will create collection named "myfriends"..
db._create('myfriends');
Sample output :
Syntax :
db._collection(collection-name);
List All Existing Collections Of Current Database:
The _collections method will return all existing collections from current database..
db._collections();
Sample output :
Drop/Delete A Collection :
We can drop(delete) an existing collection using _drop method..
db._drop(collection-name);
For example, following will delete collection named "myfriends"...
db._drop('myfriends');
Basic Document Management :
This section will explain you ... performing basic CURD operations on Documents in a Collection through ArangoDB shell(arangosh)
Creating A New Document In Collection:
We can create a new document using collection.insert method.
db.collection.insert(data);
The above creates a new document in the collection from the given data. The data must be an object.
For example the following will create new document in collection named "myfriends"..
db.myfriends.insert(
    {
      "name" : "balu",
      "address" : {
         "street" : "Ramar Street",
         "village" : "Sri Rama Kuppam",
         "post" : "seethanjeri",
         "pincode" : "602026",
         "taluk" : "Uthukkottai",
         "nation" : "India"
      },
      "education":"computer engineering",
      "occupation" : "software professional"
    }
)
Sample output :
To Insert Multiple Documents into Collection :
To insert multiple documents into collection named myfriends .. pass an array of objects to insert method..
Syntax :
db.myfriends.insert([
    {
      "name" : "balu",
      "address" : {
         "street" : "Ramar Street",
         "village" : "Sri Rama Kuppam",
         "post" : "seethanjeri",
         "pincode" : "602026",
         "taluk" : "Uthukkottai",
         "nation" : "India"
      },
      "education":"computer engineering",
      "occupation" : "software professional"
    },
    {
      "name" : "babu",
      "address" : {
         "street" : "Ramar Street",
         "village" : "Sri Rama Kuppam",
         "post" : "seethanjeri",
         "pincode" : "602026",
         "taluk" : "Uthukkottai",
         "nation" : "USA"
      },
      "education":"computer engineering",
      "occupation" : "software professional"
    }
])
Sample output :
Find or Query Data...
We can use the collection.byExample() method to retrieve data from a collection in ArangoDB... This method can Fetches all documents from a collection that match the specified filter or criteria and returns a cursor. You can specify the filter or criteria in a document and pass as a parameter to the byExample() method.
Syntax :
db.collection.byExample( { "field": "value" } );
For example to find document which consists name field with value balu..
db.myfriends.byExample( { "name": "balu" } ).toArray();
Sample output :
The document method finds a document given an object object containing the _id or _key attribute. The method returns the document if it can be found. If both attributes are given, the _id takes precedence, it is an error, if the collection part of the _id does not match the collection.
The db.collection.toArray(); method will return all documents in a collection..
For example, db.myfriends.toArray(); will return all documents in a collection named myfriends..
db.myfriends.toArray();
Sample output :
Updating Data..
Update operations can modify/replace existing documents in a collection. The update method accepts 2 parameters:
Syntax :
collection.update(selector, data)
Updates an existing document described by the selector, which must be an object containing the _id or _key attribute. There must be a document with that _id or _key in the current collection. This document is then patched with the data given as second argument. Any attribute _id, _key or _rev in data is ignored.
db.myfriends.update({"_key" : "139885"}, {"name":"madhu"});
Sample Output :
see the document collections after updated..
Sample Output :
Replace a Document
Syntax :
collection.replace(selector, data)
Replaces an existing document described by the selector, which must be an object containing the _id or _key attribute. There must be a document with that _id or _key in the current collection. This document is then replaced with the data given as second argument. Any attribute _id, _key or _rev in data is ignored.
db.myfriends.replace({"_key" : "142787"}, {"name":"abilash"});
The above will replace document with key 142787 with new document specified as second parameter.
Sample Output :
Now look at the document.. compare it with old one..
Removing Document from Collection..
We can easily remove data with collection.remove() method..
collection.remove(selector);
Removes a document described by the selector, which must be an object containing the _id or _key attribute. There must be a document with that _id or _key in the current collection. This document is then removed.
db.myfriends.remove({"_key" : "142791"});
This will remove document with key value "142791" .
Sample Output :
After this operation check the documents.. you can notice that one document got removed from collection..
Means, we can use db._document(); instead of db.collection.document(); ..
You can find more about this here..
Accessing ArangoDB From Web interface :
ArangoDB comes with a built-in web interface for administration. The web interface can be accessed via the URL:
http://127.0.0.1:8529
Or
http://localhost:8529
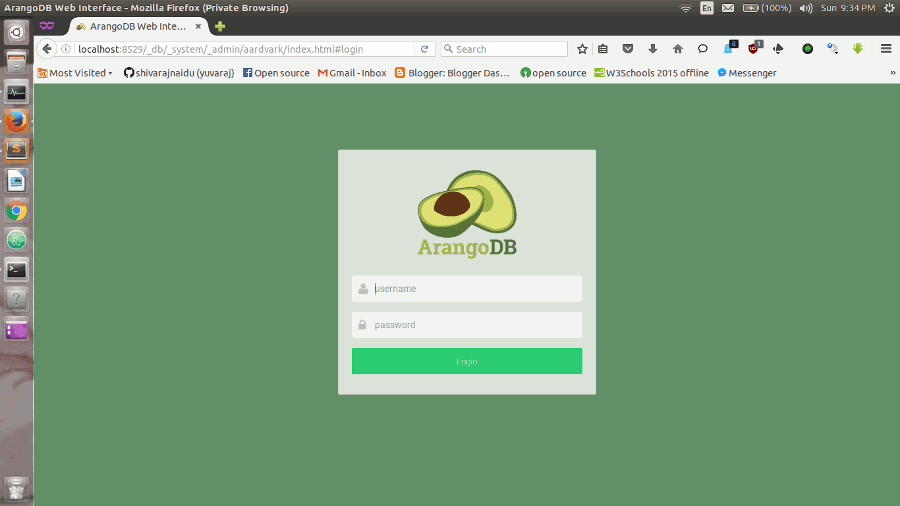
To get familiar with the database system you can use the web interface (code name Aardvark) for basic interaction. The web interface will become available shortly after you started arangod. You can access it in your browser at http://localhost:8529..
If everything works as expected, you should see the login view..

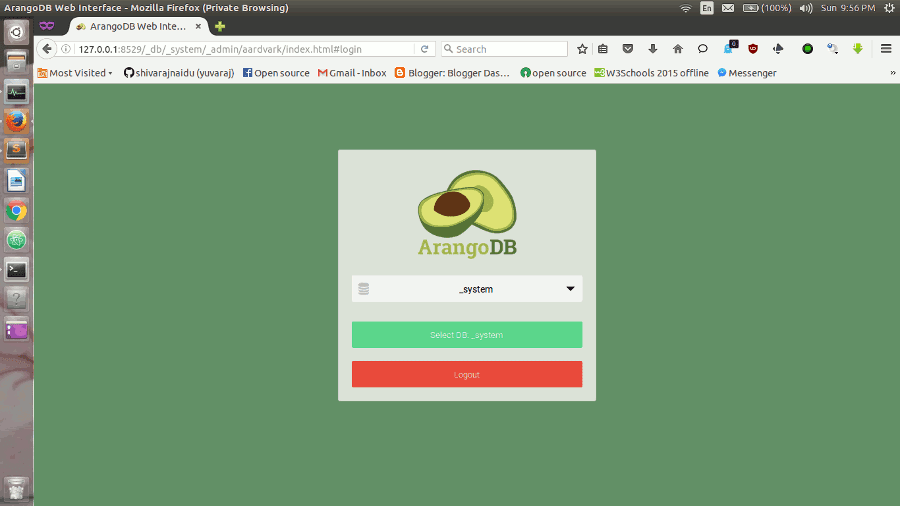
Next you will be asked which database to use. Every server instance comes with a _system database. Select this database to continue.

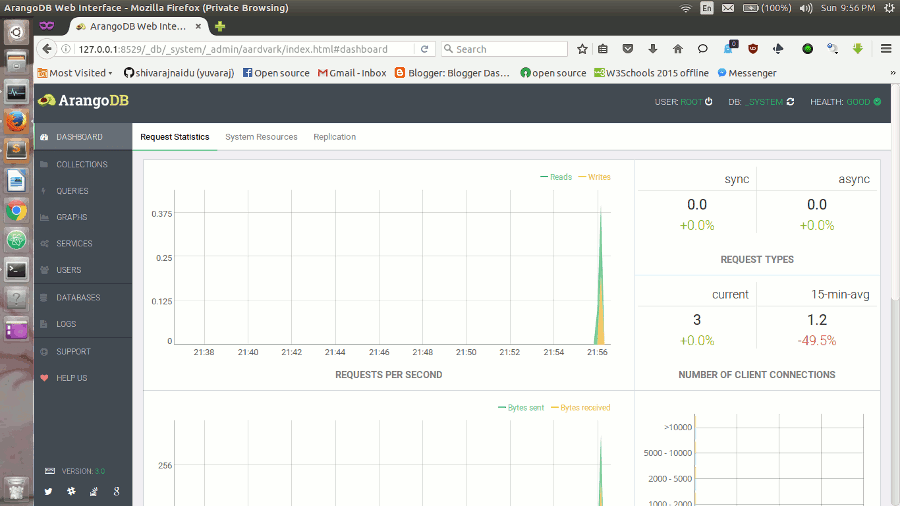
You should then be presented the dashboard with server statistics like this..

For a more detailed description of the interface, see Web Interface.
SQL to ArangoDB..
Here you can find SQL to ArangoDB mapping guide....