Showing posts with label fedora. Show all posts

Thursday, December 15, 2016

How To Install Linux Kernel 4.9 In Ubuntu Linux And Its Derivatives

How To Install Linux Kernel 4.9 In Ubuntu Linux And Its Derivatives


As usual, Last Sunday (11, DEC 2016), Linux creator Linus Torvalds officially announced the final release of Linux Kernel 4.9, codenamed 'Roaring Lionus'. Which is also the final and biggest ever release of 2016. As of writing this, Linux 4.9 is mainline kernel and the most advanced Linux kernel available in market for GNU Linux Distros...
As Soon as it was released, immediately it will be available for rolling release distros such as Arch Linux, Solus, or even openSUSE. Soon it will be available for Fedora users also.. But for Ubuntu, you have to manually install Linux 4.9, if you want to upgrade your current Linux kernel installed in your system. Here we are going to see how to install Linux 4.9 in Ubuntu Linux and It's derivatives.

So new kernel release means, new features, support for more hardware and many more bug fixes and improvements.. Here is some new features and improvements Linux kernel 4.9 brings..

Some Of The New Features Of Linux 4.9

  • Experimental support for older AMD Radeon graphics cards
  • Memory Protection Keys (MPK) are now mainlined.
  • AMDGPU virtual display support.
  • Support for 29 more ARM machines by the mainline Linux kernel.
  • and Click To See More Changes Of Linux 4.9 Here...

Install Linux 4.9

If you want to automate the installation processor.. follow the instructions given Method 1, otherwise if you want to know and install step by step follow Method 2.

Method 1 :

Just open and copy-paste the following in your terminal..

To Install Linux Kernel 4.9 in your system run the following command..

wget -O - https://gist.githubusercontent.com/shivarajnaidu/cfd4ddc12de1798a82d1dbe0b8fad0b2/raw/df86e39b818c9a6e007b0b8bd9736ea1ba0f7800/install_linux4.9_in_ubuntu.sh | sh -s

If script execution completes successfully then you are ready to go.. Just restart your system to use latest kernel... Enjoy !

If you want to remove Linux kernel for any reason.. Just pass 'd' (with out single quotes) as argument to above command

To Remove Linux Kernel 4.9 from your system run the following command..

wget -O - https://gist.githubusercontent.com/shivarajnaidu/cfd4ddc12de1798a82d1dbe0b8fad0b2/raw/df86e39b818c9a6e007b0b8bd9736ea1ba0f7800/install_linux4.9_in_ubuntu.sh | sh -s d

Method 2 :

In this method i will show you step by step process of installing Linux kernel 4.9 .....

First update your system package source list and upgrade all installed packages to latest version by running following commands..

sudo apt-get update; sudo apt-get upgrade
Warning : The Linux kernel is a critical element of the system. To do the upgrade costs when one of your hardware devices is not working properly, and the new kernel may fix this problem. But at the same time installing a new kernel unnecessarily can lead to undesirable regressions, such as: no network connection, no sound or even the inability to boot the system, so install a new kernel on your own risk.

Now make a new folder/directory to download and store required binaries files...

mkdir linux4.9 && cd linux4.9

Now download required files with following command..

For 64 bit:

wget http://kernel.ubuntu.com/~kernel-ppa/mainline/v4.9/linux-headers-4.9.0-040900_4.9.0-040900.201612111631_all.deb; wget http://kernel.ubuntu.com/~kernel-ppa/mainline/v4.9/linux-headers-4.9.0-040900-generic_4.9.0-040900.201612111631_amd64.deb; wget http://kernel.ubuntu.com/~kernel-ppa/mainline/v4.9/linux-image-4.9.0-040900-generic_4.9.0-040900.201612111631_amd64.deb;

For 32 bit:

wget http://kernel.ubuntu.com/~kernel-ppa/mainline/v4.9/linux-headers-4.9.0-040900_4.9.0-040900.201612111631_all.deb; wget http://kernel.ubuntu.com/~kernel-ppa/mainline/v4.9/linux-headers-4.9.0-040900-generic_4.9.0-040900.201612111631_i386.deb; wget http://kernel.ubuntu.com/~kernel-ppa/mainline/v4.9/linux-image-4.9.0-040900-generic_4.9.0-040900.201612111631_i386.deb

Or if you want to download manually.. you can download from here.. and put them in one directory.
if you are downloading manually.. download correct binaries for your architecture...
If you are not sure about your OS architecture.. Run getconf LONG_BIT command.. This will tell you whether the kernel is 64 bit or 32 bit..
See More On Finding System Architecture..

That's all for now.. Don't Like us on fb.com/opensourceinside


Thursday, July 7, 2016

How To Install LightTable 0.8.1 On Linux

How To Install
LightTable 0.8.1
On Linux


Lightable is an opensource, feature-rich text editor/ Integrated Development Environment (IDE) developed by Chris Granger and Robert Attorri. Released under MIT License.

It features real-time feedback allowing instant execution, debugging and access to documentation. The instant feedback provides an unusual execution environment intended to help developing abstractions.

According to wikipedia,
The developers claim that the software can reduce programming time by up to 20%.

Following are the some of the significant features of LightTable..

Features :

  • Free and open source
  • Cross-platform
  • In-line evaluation
  • Split views and instant feedback
  • Fuzzy finder
  • Auto updates
  • Modern UI
  • Auto-complete
  • Customizable

Here is how to install LightTable on Linux systems...

Installation :

There are two ways we can install LightTable on Linux

Method 1 :

Step 1 :

Just open terminal and copy paste the following code...

wget https://github.com/LightTable/LightTable/releases/download/0.8.1/lighttable-0.8.1-linux.tar.gz && tar -xzvf lighttable-0.8.1-linux.tar.gz && sudo mv lighttable-0.8.1-linux/ /opt/lighttable && sudo ln -sf /opt/lighttable/LightTable /usr/bin/lighttable

Step 2 :

Then, copy and paste the code given below on terminal

cat << EOF | sudo tee /usr/share/applications/light-table.desktop &> /dev/null [Desktop Entry] Version=1.0 Name=Light Table GenericName=Text Editor Exec=/opt/lighttable/LightTable Terminal=false Icon=/opt/lighttable/resources/app/core/img/lticon.png Type=Application Categories=GTK;Utility;TextEditor;Application;IDE;Development; EOF sudo chmod +x /usr/share/applications/light-table.desktop

Method 2 :

In this method we just use a shell script to automate above process.. Just copy and paste the code shown below...

wget -O - https://raw.githubusercontent.com/shivarajnaidu/UV-Shell-Scripts/master/LightTable-Installation-Script-For-Linux/LightTable%200.8.1%20Installation%20Script/LightTable-0.8.1-Installation-Script-For-Linux.sh | bash -

The above code will download installation script from Github and run it after file download completed.

Hi friends, I've only tested this script on Ubuntu 14.04 LTS and Ubuntu 16.04 LTS. But I hope this will work fine on other Linux distributions too.. If you can, please test it out on other Linux distributions. If you found any problem while installing LightTable with this methods.. please feel free to report it.. You can either open an issue on github or you can also report it on our Facebook Page via message(www.fb.com/opensourceinside) .

Removing/Uninstalling Lighttable From Your Linux System :

If you want to remove LightTable from your Linux system..

sudo rm -r /opt/lighttable/ /usr/bin/lighttable /usr/share/applications/light-table.desktop

Happy Coding !

Friends, Don't forget to share....


Saturday, July 2, 2016

How To Install Apache Web Server On Linux

How To Install
Apache Web Server
On Linux


Apache is an open source Web server developed by a loosely-knit group of programmers released under Apache License. The first version of Apache, based on the NCSA httpd Web server, was developed in 1995.

The original version of Apache was written for UNIX, but there are now versions that run under OS/2, Windows and other platforms.
According to wikipedia and FAQ, The name 'Apache' was chosen from respect for the Native American Indian tribe of Apache (Indé), well-known for their superior skills in warfare strategy and their inexhaustible endurance. A common misunderstanding is that it was called Apache because it was developed from existing NCSA code plus various patches, hence the name a patchy server, or Apache server.

Apache Web Servers are often used in combination with the MySQL database engine, the HyperText Preprocessor (PHP) scripting language, and other popular scripting languages such as Python and Perl. This configuration is termed LAMP (Linux, Apache, MySQL and Perl/Python/PHP) and forms a powerful and robust platform for the development and deployment of Web-based applications.

Here, I'm going to show you how to install Apache web server on different Linux systems..

Install Apache Web Server On Ubuntu Linux

Open terminal and run the following command..

sudo apt-get install apache2

Or, On Newer systems (Ubuntu 16.04 and later versions..)

sudo apt install apache2

You can find information about configuring Apache webserver on Ubuntu wikipage

Install Apache Web Server On CentOS, RHEL and Fedora Linux

For Fedora 22 and Later Releases..

sudo dnf -y install httpd

For CentOS, RHEL, Fedora 21 and earlier versions..

sudo yum -y install httpd

Install Apache Web Server on Arch Linux

First, make sure that your Arch Linux System is up-to-date by running following command

sudo pacman -Syu

Now Install Apache web server..

sudo pacman -S apache

Install Apache Web Server on SUSE Linux

sudo zypper install apache2

Install Apache Web Server on Gentoo Linux

Run the following command to ensure that your Gentoo Linux System is up-to-date..

sudo emerge --sync && sudo emerge --update world

Now run the following command to install apache on Gentoo..

sudo emerge -pv apache

Enabling/starting and testing the apache installation..

Enable the httpd service to start automatically on every reboot and start the service with systemd ...

sudo systemctl enable httpd && sudo systemctl start httpd

After successful installation of Apache web server check whether it's working properly or not.. To do so.. Just visit localhost in your web browser. You should see an Apache Test Page, like one shown in following image...


Saturday, June 25, 2016

How To Solve gvfsd-smb-browse 100% CPU usage Issue in Linux

How To Solve
gvfsd-smb-browse 100% CPU usage Issue
in Linux

Shortly, after installing Ubuntu 16.04 LTS and SAMBA file sharing in one of my friends laptop, I noticed that his laptop hangs on file open, save and on some other system operations... I have found this is caused by gvfsd-smb-browse. Yes, the theif is gvfsd-smb-browse. it's consuming 100% of your system's CPU, that makes Ubuntu 16.04 lagging badly..

Ubuntu isn't the only Linux distro which is affected by this bug, after googling about this issue, I found that Fedora Linux and some other Linux distros also affected by this gvfs issue.
Someone already filed a bug about this issue on Launchpad and Red Hat Bugzilla.
Hope soon we will get bug-fix update for this issue..

However, we can also get rid of this issue by small workaround.. I found this workaround on Ask Ubuntu forms..

Solution

We can fix this issue just by changing the permission of gvfsd-smb-browse file located in /usr/lib/gvfs/ to 744. So that we can prevent gvfsd-smb-browse from starting on system startup and now it can only be executed by sudo or root user.

open Terminal app in your Linux system and run the following command to change the the permission..

sudo chmod 744 /usr/lib/gvfs/gvfsd-smb-browse

Solution 2 :

One of our facebook page follower commented another solution for this issue..

That solution is posted in Red Hat Bugzilla.. According to that post mentioned in Red hat bugzilla, we can solve this issue just by adding single line in /etc/samba/smb.conf file

Note : This change only addresses the 100% CPU usage when opening the Nautilus file browser after a initial boot or reboot. I am not sure what other issues with gvfsd-smb-browse and 100% CPU usage this may impact so your experience may vary.

Step 1 :

Make a back up of your /etc/samba/smb.conf file.

Step 2 :

Using your preferred editor edit the smb.conf file and add the following line below the "[global]" statement

name resolve order = wins lmhosts bcast

Step 3 :

Your file should look like this:

[global] name resolve order = wins lmhosts bcast

Step 4 :

Save the file and reboot.

This should resolve the 100% CPU usage problem and you should notice that the "Network" Icon and label should appear in your file browser much quicker that before.

If you find any changes required to this post or find any typo error please let us know about it.. please drop your comment on our facebook page message box fb.com/opensourceinside


Friday, June 24, 2016

How To Upgrade Fedora 23 to Fedora 24

How To Upgrade Fedora 23 to Fedora 24


Fedora 24 officially released on 21-JUNE-2016 and You'll likely want to upgrade your system. Here I'll show you how to upgrade Fedora 23 to Fedora 24 using DNF system upgrade plugin.

1. Upgrade and back up your system

Before doing anything, It's good habit to back-up your system and ensure that you have the latest software running on your Fedora 23 .. You can upgrade all packages to its latest version by running command shown below in your terminal..

sudo dnf upgrade --refresh
Common issues in upgrading Fedora 23 to 24 :
According to official Fedora 24 release notes... "Rpmfusion packages block Fedora upgrade".

At the time of release, rpmfusion packages were blocking Fedora upgrades with a message similar to:

Error: Package a52dec-0.7.4-19.fc24.x86_64.rpm is not signed

This is a third-party repository issue outside of Fedora control. You can read more about possible solutions in this blog post. The repository maintainers are supposedly working on signing their repo, so that the issue disappears in the future.

2. Install the DNF plugin

Next, open a terminal and type the following command to install the plugin..

sudo dnf install dnf-plugin-system-upgrade

3. Start upgrading your system..

Now that your system is up-to-date, backed up, and you have the DNF plugin installed, you can begin the upgrade by using the following command in a terminal

sudo dnf system-upgrade download --releasever=24

You can also include the --allowerasing option which helps to remove all packages that may break the upgrade process as a result of certain packages not having updates, retired packages or even broken dependency issues.

5. Reboot and upgrade

Once the previous command finishes downloading all of the upgrades, your system will be ready for rebooting. To boot your system into the upgrade process, type the following command in a terminal

sudo dnf system-upgrade reboot

This will reboot your machine immediately. The system should boot again info Fedora using the same kernel, but this time, the upgrade process appears on the boot screen.

Further Information

For more detailed instructions on using dnf for upgrading, including a breakdown of other flags, check out the DNF system upgrade wiki article. This page also has frequently asked questions you may have during an upgrade and also don't forget to check known issues.

Happy Upgrades!

DNF system upgrade plugin develpment page Github. If you find any issue with this plugin open an issue on Github.


Upgrading Fedora (With DNF system upgrade)

Upgrading Fedora
(With DNF system upgrade)


When it comes to upgrading Fedora Linux, you're likely familiar with the fedup tool. However the new Fedora releases which uses dnf as package manager(Fedora 22 and later..), features a new release method. Now we can upgrade Fedora with DNF system upgrade plugin. Using this plugin will make your upgrading process simple and easy.

From the release of Fedora 23, you can even upgrade your system to next release easily using the GUI gnome-software (referred to as Software app in a fully updated Fedora 23).

1. Upgrade and back up your system

Before doing anything, It's good habit to back-up your system and ensure that you have the latest software running on your current system.. You can upgrade all packages to its latest version by running command shown below in your terminal..

sudo dnf upgrade --refresh

2. Read about common problems

Further down in this page there is a list of common problems specific to yum or dnf upgrades for specific versions. Some of them require attention before the upgrade.

General advice on upgrading Fedora can be found on the Upgrading page. You should also read the Installation Guide and Release Notes for the version you plan to upgrade to - they contain important information regarding upgrading issues. Finally, check the list of Common bugs.

3. Install the DNF plugin

Next, open a terminal and type the following command to install the plugin..

sudo dnf install dnf-plugin-system-upgrade

4. Now, You're Ready To Upgrade Your System..

Now that your system is up-to-date, backed up, and you have the DNF plugin installed, you can begin the upgrade by using the following command in a terminal

sudo dnf system-upgrade download --releasever=release_number

Don't forget to replace "release_number"(highlighted in red color) with Release Number of Fedora which you want to upgrade to..

For example, if you're going to upgrade your Fedora 23 system to Fedora 24, the above command will looks like one shown below..

sudo dnf system-upgrade download --releasever=24

You can also include the --allowerasing option which helps to remove all packages that may break the upgrade process as a result of certain packages not having updates, retired packages or even broken dependency issues.

5. Reboot and upgrade

Once the previous command finishes downloading all of the upgrades, your system will be ready for rebooting. To boot your system into the upgrade process, type the following command in a terminal

sudo dnf system-upgrade reboot

This will reboot your machine immediately. The system should boot again info Fedora using the same kernel, but this time, the upgrade process appears on the boot screen.

Further Information

For more detailed instructions on using dnf for upgrading, including a breakdown of other flags, check out the DNF system upgrade wiki article. This page also has frequently asked questions you may have during an upgrade and also don't forget to check known issues.

Happy Upgrades!

DNF system upgrade plugin develpment page Github. If you find any issue with this plugin open an issue on Github.


Sunday, June 5, 2016

How To Install Audacity In Linux

How To Install Audacity In Linux


Audacity is a free open source digital audio editor and recording computer software application, available for Windows, OS X, Linux and other operating systems.

For basic audio recording, Audacity works. It doesn't provide any advanced mixing or composition tools, but it has wonderful effects and detailed tools for audio editing. Audacity is probably the best program to explore the nature of sound in fundamental ways, playing with generating tones and combining waveforms.

Install Audacity On Ubuntu..

You can use Audacity PPA to install Audacity on ubuntu systems..

sudo add-apt-repository -y ppa:audacity-team/daily && sudo apt-get update && sudo apt-get install audacity

Install Audacity On Fedora..

Audacity 2.1.2 is not available via any repository, we have to download the audacity rpm package and to install it via rpm. Follow the instructions for your system and architecture exactly, in order to get a successful installation.

For 32 bit systems:

cd && wget https://kojipkgs.fedoraproject.org//packages/audacity/2.1.2/4.fc24/i686/audacity-2.1.2-4.fc24.i686.rpm && sudo rpm -Uhv audacity-2.1.2-4.fc24.i686.rpm

For 64 bit systems

cd && wget https://kojipkgs.fedoraproject.org//packages/audacity/2.1.2/4.fc24/x86_64/audacity-2.1.2-4.fc24.x86_64.rpm && sudo rpm -Uhv audacity-2.1.2-4.fc24.x86_64.rpm

How to install MuseScore In Linux

How to install MuseScore In Linux


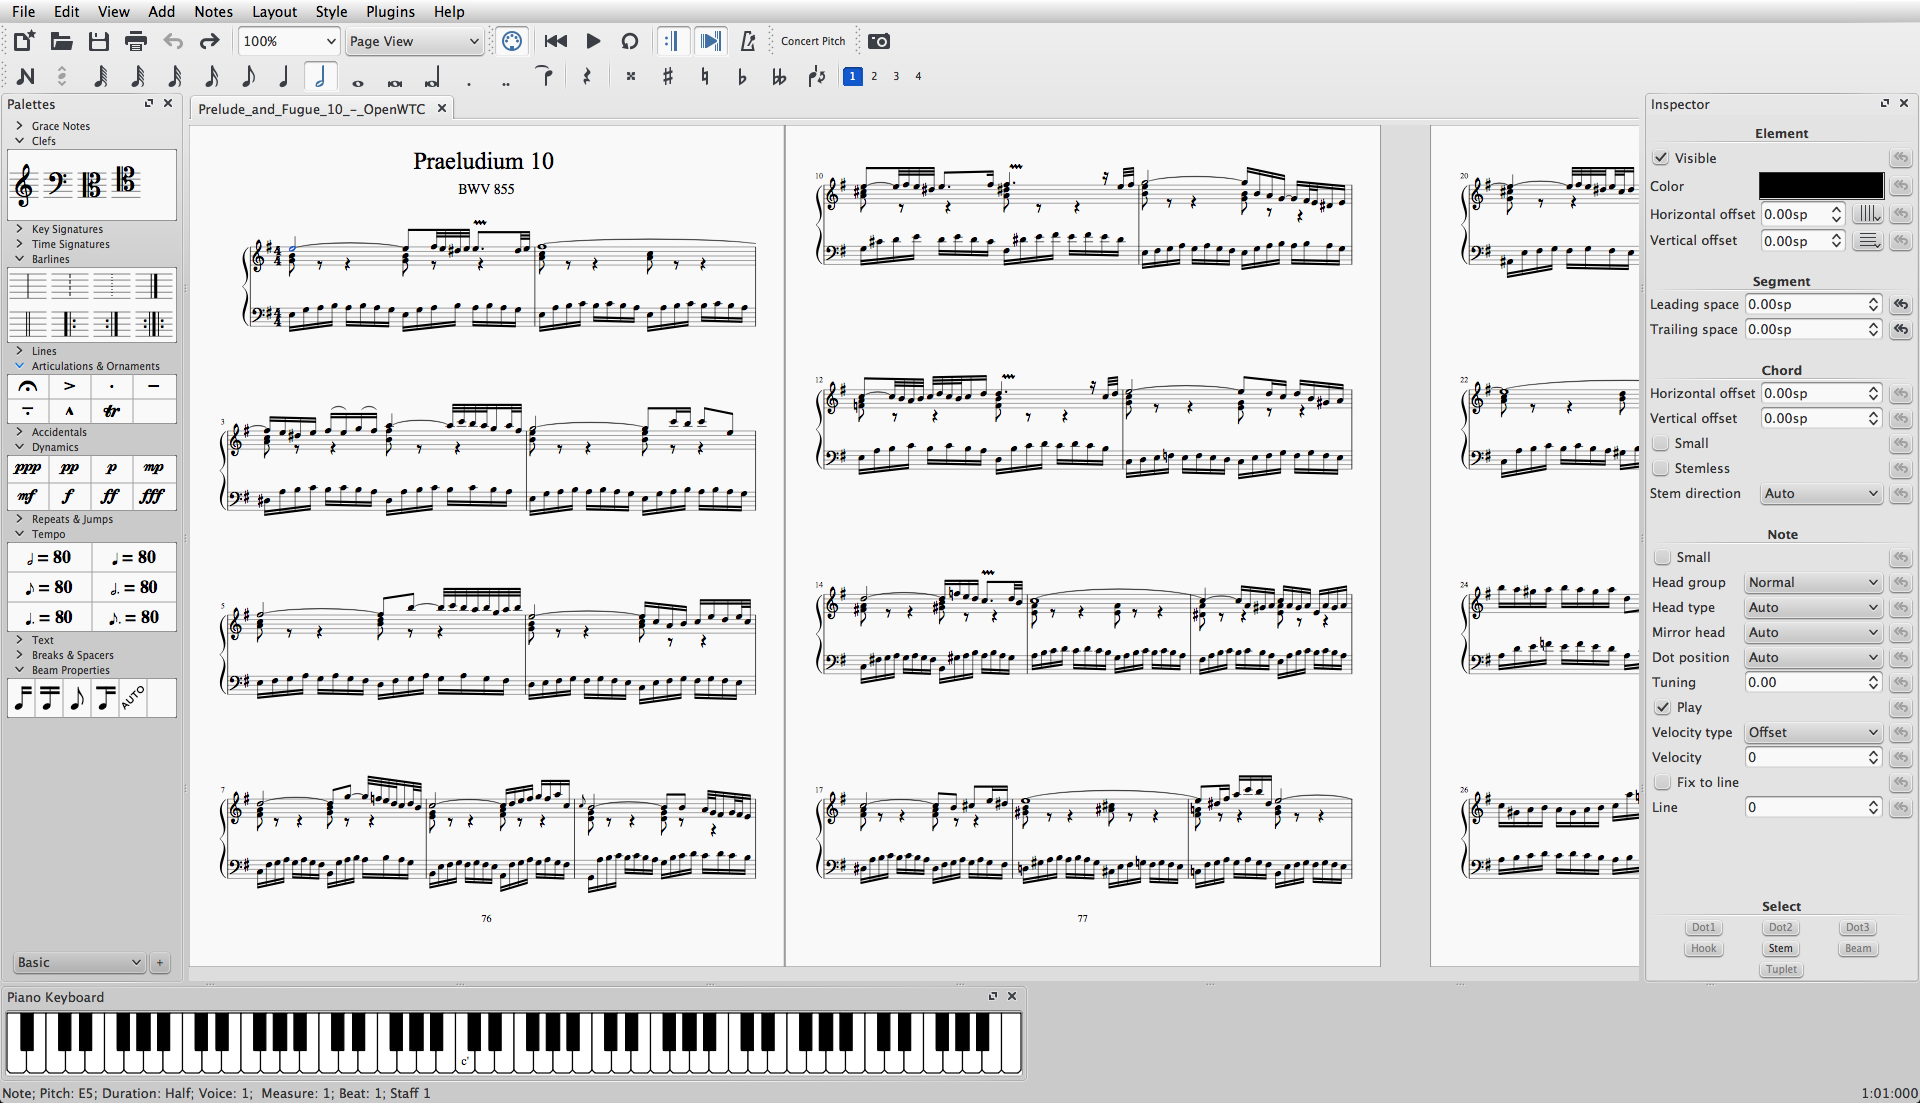
MuseScore is a scorewriter for Windows, OS X, and Linux, comparable to Finale and Sibelius, supporting a wide variety of file formats and input methods. It is released as free and open-source software under the GNU General Public License.

MuseScore was originally created as a fork of the MusE sequencer's codebase. At that time, MusE included notation capabilities and in 2002, Werner Schweer, one of the MusE developers, decided to remove notation support from MusE and fork the code into a stand-alone notation program. Since then, MuseScore has been under constant active development.

Installation through PPA (For Ubuntu based Linux systems only..) :

Run the following command to install MuseScore in Ubuntu and it's derivative linux systems..

sudo add-apt-repository -y ppa:mscore-ubuntu/mscore-stable && sudo apt-get update && sudo apt-get install musescore

Installation Through Appimage (Works for all Linux Systems..)

Appimage is a new application format for Linux applications.. It doesn't require installation. these apps are fully portable and we can run this apps probably on any Linux system.. Here I will show you how to download and run this apps on your Linux system.

Step 1 - Download :

Before you download an AppImage, you need to know your processor's architecture. These terminal commands will show it:

arch

or

uname -m

The output will be something like "i686", "x86_64" or "armv7":

  • i686 (or similar) - 32 bit Intel/AMD processor. (Found on older machines.)
  • x86_64 (or similar) - 64 bit Intel/AMD processor. (Modern laptop and desktop computers, most Chromebooks.)
  • armv7 (or later) - ARM processor. (Phones & tablets, Raspberry Pi 2/3 running Ubuntu Mate, some Chromebooks. Usually 32 bit at present.)

Now you can head over to the Download page and find the AppImage that best matches your architecture. Once downloaded, the file will be named "MuseScore-X.Y.Z-$(arch).AppImage".

Step 2 - Give execute permission :

Before you can use the AppImage you need to give permission for it to be run as a program.

From Terminal :

This command gives the user (u) permission to execute (x) the AppImage. It works on all Linux systems.

cd ~/Downloads && chmod u+x MuseScore*.AppImage

Note: Use the "cd" command to change directory to wherever you saved the AppImage. For example the above command assumes that our downloaded Appimage is present inside the user's Desktop folder..

From a File Manager:

If you prefer to avoid the command line, there is usually a way give execute permission from inside a File Manager.
In GNOME Files (Nautilus), simply:

  1. Right-click on the AppImage and select "Properties".
  2. Open the "Permissions" tab.
  3. Enable the option labelled "Allow executing file as a program".

Step 3 - Run it! :

Now you should be able to run the program simply by double-clicking on it!

When you downloaded the AppImage it was probably saved in your Downloads folder, but you can move somewhere else it at any time (e.g. you could put it on your desktop for easy access). If you ever want to remove it then simply delete it.


Saturday, June 4, 2016

Corebird : A Modern, Native Gtk+ Twitter client for the Linux desktop

Corebird
Native Gtk+ Twitter client for the Linux desktop

Corebird is a modern, easy-to-use and opensource Native Gtk+ Twitter client for Linux which provides support for almost all twitter features, including lists, favourites, direct messages and of course tweeting.

Install Corebird on Ubuntu :

The easiest way of installing corebird on Ubuntu is adding a PPA from ubuntuhandbook1.

sudo add-apt-repository -y ppa:ubuntuhandbook1/corebird && sudo apt-get update && sudo apt-get install corebird && sudo apt-get -f install

Install Corebird on Fedora

Note that Corebird uses relatively new Gnome technologies.. so it only works Fedora 20 and Later..

For Fedora 22 and later:

sudo dnf install corebird

For Fedora 21 and older releases:

sudo yum install corebird

Shortcuts :

Here's the some useful shortcuts for Corebird app..

KeyDescription
Ctrl + tCompose Tweet
BackGo one page back (this can be triggered via the back button on the keyboard, the back thumb button on the mouse or Alt + Left)
ForwardGo one page forward (this can be triggered via the forward button on the keyboard, the forward thumb button on the mouse or Alt + Right)
Alt + numGo to page num (between 1 and 7 at the moment)
Ctrl + Shift + sShow/Hide sidebar
Ctrl + pShow account settings
Ctrl + kShow account list
Ctrl + Shift + pShow application settings

Friday, June 3, 2016

Top Things To Do After Installing Fedora Linux On Your System (part 2)

Top Things To Do
After Installing Fedora Linux
On Your System
(part 2)


Previous Page (part 1)

21 . Install Gparted - Disk partitioning app

GParted is a GTK+ front-end to GNU Parted and an official GNOME partition-editing application (alongside Disks). GParted is used for creating, deleting, resizing, moving, checking, and copying disk partitions and their file systems. This is useful for creating space for new operating systems, reorganizing disk usage, copying data residing on hard disks, and mirroring one partition with another (disk imaging).

For Fedora 22 and later

sudo dnf install gparted

For Fedora 21 and older releases..

sudo yum install gparted

22 . Install Openshot Video Editor

OpenShot Video Editor is a simple, powerful , free and open-source video editing software available for Linux , windows and OS X. and it supports many media formats.

Installation :

Fortunately , Openshot shipping its binaries in Appimage format. Means No installation Needed. Just go to Official download page , download the package and make it executable and run.

For example if you download openshot version 2.0.7 from http://releases.openshot.org/linux/OpenShot-2.0.7.AppImage ,You can run it by just making it as executable.

make it executable with following command.. sudo chmod a+x downloaded_filename

Here ,for openshot 2.0.7

cd && wget http://releases.openshot.org/linux/OpenShot-2.0.7.AppImage && sudo chmod a+x OpenShot-2.0.7.AppImage

23 . Install Cheese

Cheese uses your webcam to take photos and videos, applies fancy special effects and lets you share the fun with others. To install cheese on your Fedora desktop, enter the following command:

For Fedora 22 and later

sudo dnf install cheese

For Fedora 21 and older releases..

sudo yum install cheese

24 . Install Shutter

Shutter is a feature-rich screenshot program for Linux based operating systems. You can take a screenshot of a specific area, window, your whole screen, or even of a website - apply different effects to it, draw on it to highlight points, and then upload to an image hosting site, all within one window. Shutter is free, open-source, and licensed under GPL v3.

Installation :

For Fedora 22 and later

sudo dnf install shutter

For Fedora 21 and older releases..

sudo yum install shutter

25 . Install Meld and Recoll

Meld is a visual diff and merge tool targeted at developers. Meld helps you compare files, directories, and version controlled projects. It provides two- and three-way comparison of both files and directories, and has support for many popular version control systems.
Meld helps you review code changes and understand patches. It might even help you to figure out what is going on in that merge you keep avoiding.

Meld Installation

For Fedora 22 and later

sudo dnf install meld

For Fedora 21 and older releases..

sudo yum install meld

Recol is an indexing software for Linux.. with the help of Recoll you can able to search files , not only by their names but also with it content..

For Fedora 22 and later

sudo dnf install recoll

For Fedora 21 and older releases..

sudo yum install recoll Here, You can find official documentation about how to use it..

26 . Install Screen Recorder

If you want to record desktop screen casts on linux... then simple screen recorder is a simple and best option for your need.

Installation :

See here.. How To Install SSR on Fedora

27 . Install PostInstallerF & Fedy

PostInstallerF & Fedy utility tools help us to install additional software which wasn't included in Fedora by default. Both having GUI and we can install, remove and manage it very easily. This was designed for newbies whoever not familiar in command line.

Install Fedy utility

su -c "curl http://folkswithhats.org/fedy-installer -o fedy-installer && chmod +x fedy-installer && ./fedy-installer"

Install postinstallerf

sudo wget -P /etc/yum.repos.d/ https://raw.github.com/kuboosoft/postinstallerf/master/postinstallerf.repo && sudo dnf -y install postinstallerf

Don't Forget To Share It With Your Friends..!!
Share Your With Linux and Opensource


Previous Page (part 1)


Sunday, May 22, 2016

Simple Screen Recorder (SSR) A Feature Rich Screen Recorder Application For Linux

Simple Screen Recorder (SSR)
A Feature Rich Screen Recorder Application For Linux


ssr

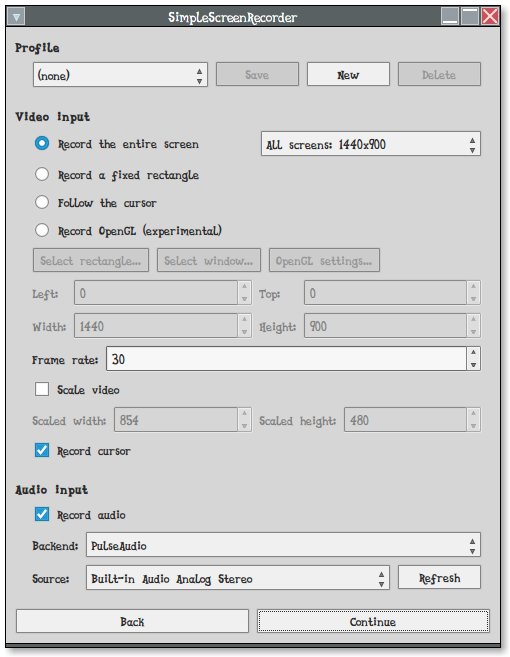
SimpleScreenRecorder is a Qt-based sophisticated opensource screencast software made for Linux operating systems , which was created as a simpler alternative to programs such as ffmpeg/avconv and VLC.

The official website states that... following as ssr's main goal..

SimpleScreenRecorder is a Linux program that I've created to record programs and games. There were already a few programs that could do this, but I wasn't 100% happy with any of them, so I created my own.
My original goal was to create a program that was just really simple to use, but as I was writing it I started adding more and more features, and the result is actually a pretty powerful program. It's 'simple' in the sense that it's easier to use than ffmpeg/avconv or VLC, because it has a straightforward user interface.

Features :

  • Graphical user interface (Qt-based).
  • Faster than VLC and ffmpeg/avconv.
  • Records the entire screen or part of it, or records OpenGL applications directly (similar to Fraps on Windows).
  • Synchronizes audio and video properly (a common issue with VLC and ffmpeg/avconv).
  • Reduces the video frame rate if your computer is too slow (rather than using up all your RAM like VLC does).
  • Fully multithreaded: small delays in any of the components will never block the other components, resulting is smoother video and better performance on computers with multiple processors.
  • Pause and resume recording at any time (either by clicking a button or by pressing a hotkey).
  • Shows statistics during recording (file size, bit rate, total recording time, actual frame rate, ...).
  • Can show a preview during recording, so you don't waste time recording something only to figure out afterwards that some setting was wrong.
  • Uses libav/ffmpeg libraries for encoding, so it supports many different codecs and file formats (adding more is trivial).
  • Sensible default settings: no need to change anything if you don't want to.
  • Tooltips for almost everything: no need to read the documentation to find out what something does.

Installation

Install SSR on Ubuntu And Its Derivatives

There is a PPA available for Ubuntu/Linux Mint and its derivatives.. So we can simply add that to our system and can install it easily..

Run the following command to install SSR in Ubuntu..

sudo add-apt-repository -y ppa:maarten-baert/simplescreenrecorder && sudo apt-get update && sudo apt-get install simplescreenrecorder ubuntu-restricted-extras simplescreenrecorder-lib:i386

Install SSR on Fedora/RHEL/CentOS

You have to enable RPM Fusion repos(EPEL repos too.. for RHEL and CentOS) inorder to install SSR dependencies

Step 1 :

Before installing SSR you have to enable/install RPM Fusion repos , for RHEL/CentOS, EPEL repos.. You Can Find Instructions here.. How To Enable RPM Fusion repos and How To Enable EPEL repos

Step 2 :

Now install required dependencies..

For Fedora 22 and later..

sudo dnf install ffmpeg-devel qt4-devel alsa-lib-devel pulseaudio-libs-devel jack-audio-connection-kit-devel \ gcc make gcc-c++ glibc-devel.i686 libgcc.i686 libX11-devel libX11-devel.i686 libXext-devel libXext-devel.i686 \ libXfixes-devel libXfixes-devel.i686 mesa-libGL-devel mesa-libGL-devel.i686 mesa-libGLU-devel mesa-libGLU-devel.i686 \ mesa-libGLU-devel.x86_64 qt4 git

For Fedora 21/RHEL/CentOS..

sudo yum install ffmpeg-devel qt4-devel alsa-lib-devel pulseaudio-libs-devel jack-audio-connection-kit-devel \ gcc make gcc-c++ glibc-devel.i686 libgcc.i686 libX11-devel libX11-devel.i686 libXext-devel libXext-devel.i686 \ libXfixes-devel libXfixes-devel.i686 mesa-libGL-devel mesa-libGL-devel.i686 mesa-libGLU-devel mesa-libGLU-devel.i686 \ mesa-libGLU-devel.x86_64 qt4 git

Step 3 :

Clone/download the GitHub repository for Simple Screen Recorder:

cd && git clone https://github.com/MaartenBaert/ssr && cd ssr

Step 4 :

And finally, execute the installation script. to install the ssr..

chmod +x simple-build-and-install && ./simple-build-and-install

If the installation does not create a launch icon in the Applications menu, you can start Simple Screen Recorder from the terminal.

simplescreenrecorder

Or

ln -s $(which simplescreenrecorder) ~/Desktop/'Simple Screen Recorder'