Showing posts with label nodejs. Show all posts

Saturday, September 15, 2018

Getting Started With RabbitMQ in 10 Minutes (On Ubuntu)

Getting Started With RabbitMQ in 10 Minutes


RabbitMQ is one of the most popular opensource message broker/Queuing engine available in the market.. It has been used as communication(Message Oriented) bridge in many software architectures.. Communication between Microservices is one of the obvious use case where we can use MQ to make things simple .. RabbitMQ makes communication between services easy with it's simple messaging system.. Rabbit MQ supports multiple protocols like AMQP

In one of our projects, We've used it to delegate the heavy processing things to worker process written in python form single threaded NodeJs process.. thus it makes easy to scale our services and opened the doors to polyglot architecture for our services... we enjoyed it a lot.. So I thought to write a simple article which will help people to get start with RabbitMQ in 10 minutes..

Installing RabbitMQ (In Ubuntu based systems)

First update source-list and add signing key

sudo apt update wget -O - 'https://dl.bintray.com/rabbitmq/Keys/rabbitmq-release-signing-key.asc' | sudo apt-key add -

Now add repository to source list

echo "deb https://dl.bintray.com/rabbitmq/debian $(lsb_release -cs) main erlang" | sudo tee /etc/apt/sources.list.d/bintray.rabbitmq.list

Now update the source list and install the RabbitMQ ....

sudo apt update sudo apt install rabbitmq-server -y

The server is started as a daemon by default when the RabbitMQ is installed.

Verify the installation.. with the following command...

sudo systemctl status rabbitmq-server.service
shivaraj@shivaraj-Aspire-A315-21:~$ sudo systemctl status rabbitmq-server.service [sudo] password for shivaraj: ● rabbitmq-server.service - RabbitMQ broker Loaded: loaded (/lib/systemd/system/rabbitmq-server.service; enabled; vendor preset: enabled) Active: active (running) since Sat 2018-09-15 15:25:31 IST; 1h 29min ago Main PID: 1217 (beam.smp) Status: "Initialized" Tasks: 86 (limit: 4486) CGroup: /system.slice/rabbitmq-server.service ├─1217 /usr/lib/erlang/erts-9.2/bin/beam.smp -W w -A 64 -P 1048576 -t 5000000 -stbt db -zdbbl 1280000 -K true -- -root /usr/lib/erlang -progname erl -- -home /var/lib/rabbitmq -- -p ├─1333 /usr/lib/erlang/erts-9.2/bin/epmd -daemon ├─1572 erl_child_setup 1024 ├─1624 inet_gethost 4 └─1625 inet_gethost 4 Sep 15 15:25:26 shivaraj-Aspire-A315-21 rabbitmq-server[1217]: ## ## Sep 15 15:25:26 shivaraj-Aspire-A315-21 rabbitmq-server[1217]: ## ## RabbitMQ 3.7.7. Copyright (C) 2007-2018 Pivotal Software, Inc. Sep 15 15:25:26 shivaraj-Aspire-A315-21 rabbitmq-server[1217]: ########## Licensed under the MPL. See http://www.rabbitmq.com/ Sep 15 15:25:26 shivaraj-Aspire-A315-21 rabbitmq-server[1217]: ###### ## Sep 15 15:25:26 shivaraj-Aspire-A315-21 rabbitmq-server[1217]: ########## Logs: /var/log/rabbitmq/rabbit@shivaraj-Aspire-A315-21.log Sep 15 15:25:26 shivaraj-Aspire-A315-21 rabbitmq-server[1217]: /var/log/rabbitmq/rabbit@shivaraj-Aspire-A315-21_upgrade.log Sep 15 15:25:26 shivaraj-Aspire-A315-21 rabbitmq-server[1217]: Starting broker... Sep 15 15:25:31 shivaraj-Aspire-A315-21 rabbitmq-server[1217]: systemd unit for activation check: "rabbitmq-server.service" Sep 15 15:25:31 shivaraj-Aspire-A315-21 systemd[1]: Started RabbitMQ broker. Sep 15 15:25:32 shivaraj-Aspire-A315-21 rabbitmq-server[1217]: completed with 3 plugins. shivaraj@shivaraj-Aspire-A315-21:~$

And also I'll show you small how to with NodeJS and RabbitMQ.. for this you need to have Node installed in your system.. If you haven't installed NodeJs you can check the instructions here..

First you need to install amqplib.. it's RabbitMQ client for NodeJs..

npm install amqplib

Then create two files named.. sender.js and receiver.js

Now you can run the receiver.js and and publisher.js and you can see the output like one shown below...

node sender.js
shivaraj@shivaraj-Aspire-A315-21:~/mqtest$ node sender.js Connected Published New Task Published New Task Published New Task
node receiver.js
shivaraj@shivaraj-Aspire-A315-21:~/mqtest$ node receiver.js Connected Do Something.... Do Something.... Do Something.... Do Something.... Do Something....

If you want to use it with other languages.. please check official guide.. https://www.rabbitmq.com/getstarted.html

That's it for now.. If you like.. don't forget to share it guys.. You can follow us on fb.com/opensourceinside and also subscribe our channel on Youtube..


Saturday, June 30, 2018

Installing Multiple Versions Of NodeJs Versions On Your Linux System

Installing Multiple Versions Of NodeJs Versions On Your Linux System


Today, I'm going to show you how to install and manage multiple versions of NodeJs on your linux system.

We are going to use NVM to install and manage multiple versions of NodeJs on same system. So we need to install NVM first.. To install it just copy paste the below command.

wget -qO- https://raw.githubusercontent.com/creationix/nvm/v0.33.11/install.sh | bash

The above script will download and install NVM on your Linux box.. Now run the below command to activate it in current terminal session or just close and open your current terminal session.

source ~/.bashrc

Now just check the NVM installation with following command..

nvm --version

It should print version like one shown below..

shivaraj@shivaraj-A14RM0E:~/articles-now$ nvm --version 0.33.8 shivaraj@shivaraj-A14RM0E:~/articles-now$

Installing NodeJs with NVM

Now we are going to see how to install the latest version of Nodejs using NVM..
Just Run the below command to install latest version of nodejs in your system

nvm install node

This will produce output like one shown below.. on successful installation..

shivaraj@shivaraj-A14RM0E:~/articles-now$ nvm install node Downloading and installing node v10.5.0... Downloading https://nodejs.org/dist/v10.5.0/node-v10.5.0-linux-x64.tar.xz... ######################################################################## 100.0% Computing checksum with sha256sum Checksums matched! Now using node v10.5.0 (npm v6.1.0)

You can check the version of node installed with node -v and npm with npm -v

shivaraj@shivaraj-A14RM0E:~/articles-now$ node -v v10.5.0 shivaraj@shivaraj-A14RM0E:~/articles-now$ npm -v 6.1.0 shivaraj@shivaraj-A14RM0E:~/articles-now$

You can install particular version of NodeJs with npm install version-number. For example to install NodeJs version 8 you can use nvm install 8

shivaraj@shivaraj-A14RM0E:~/articles-now$ nvm install 8 Downloading and installing node v8.11.3... Downloading https://nodejs.org/dist/v8.11.3/node-v8.11.3-linux-x64.tar.xz... ######################################################################## 100.0% Computing checksum with sha256sum Checksums matched! Now using node v8.11.3 (npm v5.6.0) shivaraj@shivaraj-A14RM0E:~/articles-now$

To check the different versions of NodeJs installed in your local system.. run the following command

nvm ls
shivaraj@shivaraj-A14RM0E:~/articles-now$ nvm ls v8.9.4 -> v8.11.3 v9.4.0 v10.5.0 default -> 8 (-> v8.11.3) node -> stable (-> v10.5.0) (default) stable -> 10.5 (-> v10.5.0) (default) iojs -> N/A (default) lts/* -> lts/carbon (-> v8.11.3) lts/argon -> v4.9.1 (-> N/A) lts/boron -> v6.14.3 (-> N/A) lts/carbon -> v8.11.3 shivaraj@shivaraj-A14RM0E:~/articles-now$

To switch from one version to other you can use following command.. nvm use version number. for example to use Node Version 10 you have to run nvm use 10

shivaraj@shivaraj-A14RM0E:~/articles-now$ nvm use 10 Now using node v10.5.0 (npm v6.1.0) shivaraj@shivaraj-A14RM0E:~/articles-now$

If you want to set some node version as default version to use ... you can set it with following command.. nvm alias default node-version.. if you want to set the node version 8 as default one you can set it by running this command nvm alias default 8

shivaraj@shivaraj-A14RM0E:~/articles-now$ nvm alias default 8 default -> 8 (-> v8.11.3) shivaraj@shivaraj-A14RM0E:~/articles-now$

Here is the video for above tutorial...


That's it for now.. Thank You.. If you like don't forget to share it guys.. You can follow us on fb.com/opensourceinside and also subscribe our channel on Youtube..

Sunday, December 25, 2016

How To Send Email From Nodejs To Gmail

How To Send Email From Nodejs To Gmail
(Using NodeMailer)


In PHP, we can send e-mail using mail() function which internally uses/requires sendmail program (or equivalent program like postfix on Linux..)
See how to install and configure postfix to send e-mail from postfix

In the case of NodeJs, we can use NodeMailer NPM module to send emails from NodeJS. Here I'm going to show you how to send email from NodeJs to Gmail using NodeMailer NPM.

Step 1: Create/Initialize New Node Project

Create a folder and run npm init then create file named mail.js

Create New Folder For Node Project and Enter Into That Folder:

mkdir node-email && cd node-email

Now initialize project with npm init

npm init

The output of above command will look like following one..

shivaraj@shivaraj-A14RM0E:~/node-email$ npm init
This utility will walk you through creating a package.json file.
It only covers the most common items, and tries to guess sensible defaults.

See `npm help json` for definitive documentation on these fields
and exactly what they do.

Use `npm install <pkg> --save` afterwards to install a package and
save it as a dependency in the package.json file.

Press ^C at any time to quit.
name: (node-email) 
version: (1.0.0) 
description: 
entry point: (index.js) 
test command: 
git repository: 
keywords: 
author: 
license: (ISC) 
About to write to /home/shivaraj/node-email/package.json:

{
  "name": "node-email",
  "version": "1.0.0",
  "description": "",
  "main": "index.js",
  "scripts": {
    "test": "echo \"Error: no test specified\" && exit 1"
  },
  "author": "",
  "license": "ISC"
}


Is this ok? (yes) 
shivaraj@shivaraj-A14RM0E:~/node-email$ 

After completing above step you will see new file named package.json inside your node project directory. with following content..

{ "name": "node-email", "version": "1.0.0", "description": "", "main": "index.js", "scripts": { "test": "echo \"Error: no test specified\" && exit 1" }, "author": "", "license": "ISC" }

Step 2: Now Install NodeMailer NPM

Now install NodeMailer NPM by running following command...

npm install nodemailer --save

You will see output similar to bellow one..

shivaraj@shivaraj-A14RM0E:~/node-email$ npm install nodemailer --save
node-email@1.0.0 /home/shivaraj/node-email
`-- nodemailer@2.7.0 
  +-- libmime@3.0.0 
  | +-- iconv-lite@0.4.15 
  | +-- libbase64@0.1.0 
  | `-- libqp@1.1.0 
  +-- mailcomposer@4.0.0 
  | `-- buildmail@4.0.0 
  |   +-- addressparser@1.0.1 
  |   `-- punycode@2.0.1 
  +-- nodemailer-direct-transport@3.3.2 
  | `-- smtp-connection@2.12.0 
  |   `-- httpntlm@1.6.1 
  |     +-- httpreq@0.4.22 
  |     `-- underscore@1.7.0 
  +-- nodemailer-shared@1.1.0 
  | `-- nodemailer-fetch@1.6.0 
  +-- nodemailer-smtp-pool@2.8.2 
  | `-- nodemailer-wellknown@0.1.10 
  +-- nodemailer-smtp-transport@2.7.2 
  `-- socks@1.1.9 
    +-- ip@1.1.4 
    `-- smart-buffer@1.0.11 

npm WARN node-email@1.0.0 No description
npm WARN node-email@1.0.0 No repository field.
shivaraj@shivaraj-A14RM0E:~/node-email$ 

The package.json file will now look like this...

{ "name": "node-email", "version": "1.0.0", "description": "", "main": "index.js", "scripts": { "test": "echo \"Error: no test specified\" && exit 1" }, "author": "", "license": "ISC", "dependencies": { "nodemailer": "^2.7.0" } }

Note the extra line added in package.json file...

"dependencies": { "nodemailer": "^2.7.0" }

The dependencies section indicates installed npm module name and version of that npm module... So we are using NodeMailer version 2.7 for this tutorial...

Step 3: Create app.js

Now create app.js file inside our project folder which is going to host our code for sending email...

Step 4: Now start to write code to send email from nodejs..

Import NodeMailer module into your app.js file...

var nodemailer = require('nodemailer');

Now configure/initialize nodemailer by providing required data...

var transporter = nodemailer.createTransport({ host: 'smtp.gmail.com', port: 465, secure: true, //true --> will use ssl auth: { user: 'yourusername@gmail.com', pass: 'your password' } });
Don't forget to replace user and pass fields with your email ID and password...
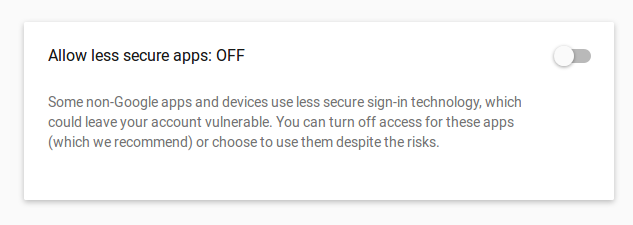
You have to Turn On Allow less secure apps in-order to use your nodemailer client work properly with gmail.. To do this go to https://myaccount.google.com/security/lesssecureapps find Allow less secure apps option and Turn On it..


Now send mail with transporter.sendMail(mailOptions, callback)... where mailOptions is an object which holds from address, to address and subject of mail etc... the second one is a callback function...

var mailOptions = { from: 'yourusername@gmail.com', to: 'friend1@gmail.com, friend2@gmail.com', subject: 'Hello', text: 'Hello world', html: '<b>Hello world </b>' }; transporter.sendMail(mailOptions, function(error, info) { if (error) { console.log(error); } else { console.log('Message sent: ' + info.response); } transporter.close(); });

call transport.close() method to close the connection..

The final version of app.js file will look like below one..

var nodemailer = require('nodemailer'); var transporter = nodemailer.createTransport({ host: 'smtp.gmail.com', port: 465, secure: true, auth: { user: 'yourusername@gmail.com', pass: 'your password' } }); var mailOptions = { from: 'yourusername@gmail.com', to: 'friend1@gmail.com, friend2@gmail.com', subject: 'Hello', text: 'Hello world', html: '<b>Hello world </b>' }; transporter.sendMail(mailOptions, function(error, info) { if (error) { console.log(error); } else { console.log('Message sent: ' + info.response); } transporter.close(); });
You can download full code sample from github..

That's all... Now run the app.js file to send email to your friend1@gmail.com, friend2@gmail.com....

node app.js

If your email get delivered successfully then you will see output similar to one shown below..

shivaraj@shivaraj-A14RM0E:~/node-email$ node app.js
Message sent: 250 2.0.0 OK 148xxxxxxx s5sxxxxxxxxxpgj.19 - gsmtp
shivaraj@shivaraj-A14RM0E:~/node-email$ 
Hi friends, If you found any issue or typo error, please feel free to report it.. You can either open an issue on github or you can also report it on our Facebook Page via message (www.fb.com/opensourceinside) .

That's it for now.. If you like don't forget to share it guys.. You can follow us on fb.com/opensourceinside and also subscribe our channel on Youtube..
Happy Coding !!


Tuesday, October 13, 2015

How To Install Node.js (latest version) in Linux

How To Install Node.js (latest version)
On Linux

Introduction:

Node.js :

Nodejs is an open source, cross platform , JavaScript runtime environment which is based on Chrome's V8 JavaScript engine. Node.js uses an event-driven, non-blocking I/O model that makes it lightweight and efficient.
It is used to develop scalable, real-time, network and server-side applications written in javascript and we can run that applications within Node.js runtime environment on OS X, Windows, Linux, solaris and BSD.

Node.js provides an event-driven architecture and a non-blocking I/O API designed to optimize an application's throughput and scalability for real-time web applications. It uses Google V8 JavaScript engine to execute code, and a large percentage of the basic modules are written in JavaScript. Node.js contains a built-in library to allow applications to act as a web server without software such as Apache HTTP Server, Nginx or IIS.

Node.js can be combined with a browser, a document database (such as MongoDB or CouchDB) and JSON for a unified JavaScript development stack.

According to wikipedia,
Node.js is used by IBM, Microsoft, Yahoo!, Walmart, LinkedIn, Rakuten, PayPal and GoDaddy.

npm :

npm is the pre-installed package manager for the Node.js server platform. It is used to install Node.js programs from the npm registry, organizing the installation and management of third-party Node.js programs.

Installtion :

For Debian and Ubuntu based distributions :

You can install the Distro-Stable Version from official repositories of your distribution ,by just running apt-get install package name in your linux command line.

sudo apt-get update && sudo apt-get install nodejs && sudo apt-get install npm

Latest versions of Nodejs providing npm as default package manager. So we dont need to install it seperately in latest versions of Node.Js.

but, there may be a chance that your distribution's official repositories may contain only older version of node js.
if u want to install latest version of nodejs(at the time of writing this post 4.x is latest version of nodejs), then you need to use node source PPA.

curl -sL https://deb.nodesource.com/setup_4.x | sudo bash -

or

wget -qO- https://deb.nodesource.com/setup_4.x | sudo bash -

Note : For example if you want to install Node.Js 6.x, Replace 4.x with 6.x. (i.e) replace it with version you want to install.


Update (Latest available LTS version of Nodejs ..)

wget -qO- https://deb.nodesource.com/setup_6.x | sudo bash -

Update (Latest available version of Nodejs ..)

wget -qO- https://deb.nodesource.com/setup_7.x | sudo bash -

After running above command, run the follollowing commands..

sudo apt-get -y install nodejs

during or after installation, if you experience any errors run this command and try again:

sudo apt-get -y install build-essential && sudo apt-get -f install

Remember.. If you are doing nodejs installation using nodesource ppa, you need not to run sudo apt-get install npm. Because npm comes along with node installation.. so don't run sudo apt-get install npm, if you are doing nodejs installation with from nodesource ppa.. otherwise if you run above command after installing nodejs from nodesource ppa, you would see error message or warning message thrown by your distributions package-manager.. don't worry about that message.. Just ignore it and enjoy NodeJS
HAPPY NODE ! .

For RPM based systems..

sudo curl --silent --location https://rpm.nodesource.com/setup_4.x | bash - && sudo yum -y install nodejs

For Fedora 22 and later versions..

sudo curl --silent --location https://rpm.nodesource.com/setup_4.x | bash - && sudo dnf -y install nodejs

Note : For example if you want to install Node.Js 6.x, Replace 4.x with 6.x. (i.e) replace it with version you want to install.

For Arch Linux

Node.js and npm packages are available in the Community Repository.

pacman -S nodejs npm

Compiling from source..

For Linux before start to compile install following packages..

sudo apt-get install g++ curl libssl-dev apache2-utils git build-essential

Step 1 :Clone source code from git repo..

cd && git clone https://github.com/nodejs/node.git

If you are using OS X you have to install git and X Code , before start to compile..

Or , simply download code as zip file from NodeJS git Repo and extract it

Step 2 : Now change directory (navigate into) to downloaded directory

cd ~/node

Step 3 : Now run compile it..

./configure && make && sudo make install

For more specific version installation instructions see here... and You can find installation instructions for more distros in official wiki.